


danf
Well-known member
Here's a link to the entire thread by littlebeaver of which contains the pictorial and further discussions- How I change my timing belts
After the pictures below there are video's to accompany them.
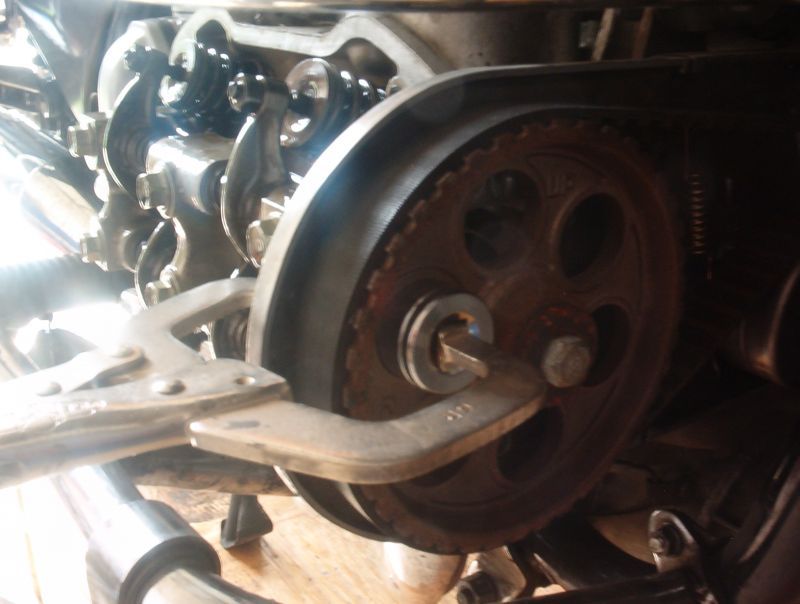
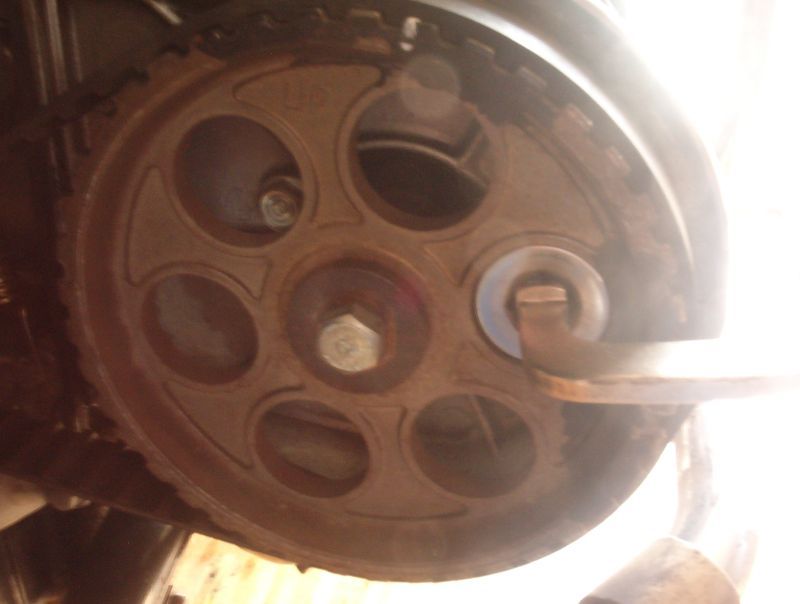
I do things a bit different than most, it's not always the best but it makes things easy for me..I read Octane's how too and it's excellent, Joe Drums is too, the way I do it nothing moves off your marks, you don't need to remove the radiator at all either...When I do a belt change I always do a valve check while I'm at it, the plugs are already out and the caps are all off so it's a great time to do it..My method is freakin crazy and I'm sure not too many guy's do it this way..I'm way way outside the box..Having control of the pulley is what I like..Having control of the crank too..Ok, remove both valve covers and pulley covers, no need to remove the radiator but if its your first time you may want to, remove your crank cover cap and your timing hole cap and put on t-1 and make sure up is up...I use a 19mm socket and two welders clamps to hold the pulley in place as shown in photo, Paint a mark of reference so you know it's at T-1 with white paint, you can paint it anywhere by the crank you can get too, its all good..12 oclock is the normal spot..I also carefully lock down the crank bolt with the vise grips as shown too[ So clamp all three spots now]..Here's what I do, I lock it at T-1 with the grips to the frame, release the tension on both belts then remove the old belts none of this one at a time stuff, ha ha and then the vise grips so the crank doesn't move, I put on the new belts on loose then clamp the crank bolt back and make sure it's on it's mark so it won't move..Now when you put those clamps on the cams with the socket, place in your new belts into the clamps, it's simple remove old belt place in new..When I did this the first time I was freaking out, because the crank moved on me..If you can keep that sucker from moving it makes everything easier..Here are my photo's, Oh, the tension shouldn't be too tight or too loose either, rotate it twice and make sure your marks are on, they will be.. I release my tensioners just loose enought to remove the belts so then go on not so loose..This works for me and this is how I do mine, then once its all set I check the valves.. It's like I never removed them..Valves should be checked anyway after a belt change in my opinion..
File comment: 19mm socket fits the hole nicely, 80's and 81's have the hole, might need to make a custom cut block of wood for the triangle one's:
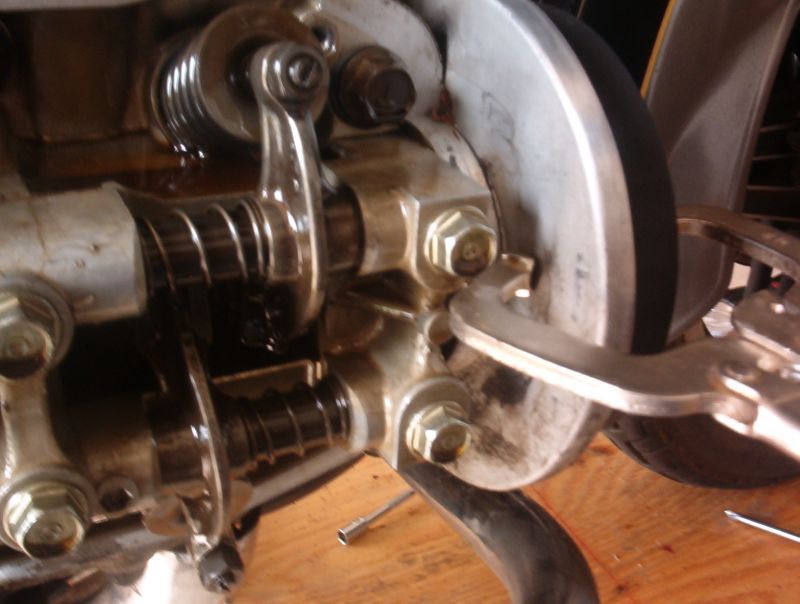
File comment: Back side of clamp:
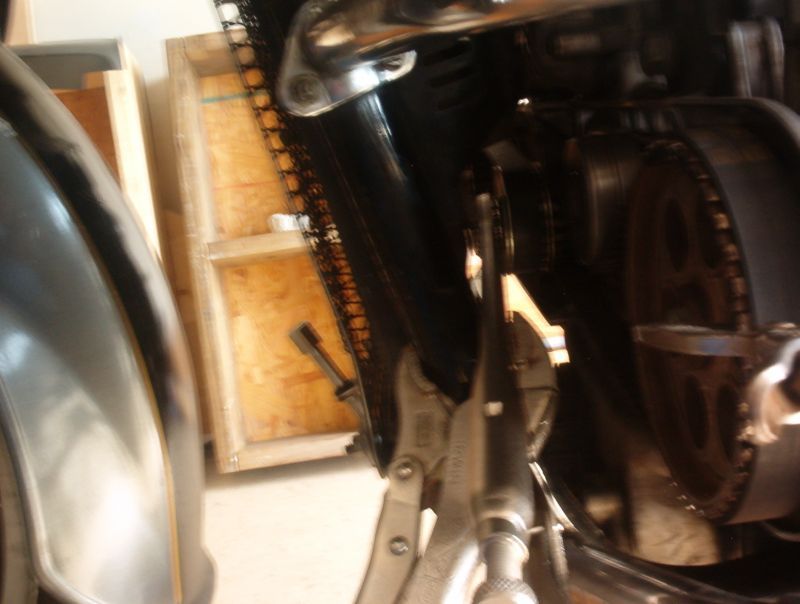
File comment: Crank being held still:
File comment: left side clamp on the center of the socket:
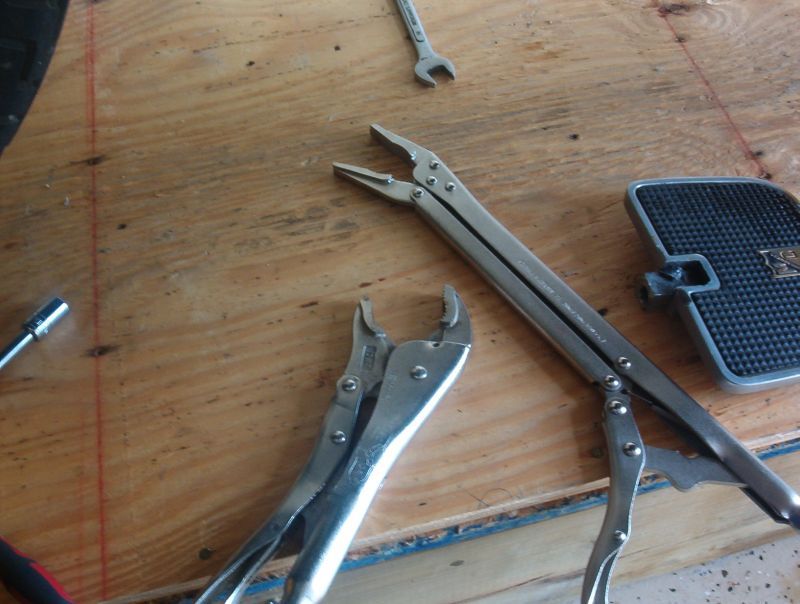
File comment: Vise tools I use to hold the crank bolt..:
It's hard to screw up anything doing it this way, if it's right to start with, it should be right when your done..
Video 1- Overview of the process:
1
Video 2- Lining up the timing marks, belts setup with clamps in place, belts ready to install:
2
Video 3- The rest of the belt change process:
3
Questions?
Post a message in the Tech Talk forums and reference the video or procedure your having trouble with.
After the pictures below there are video's to accompany them.
I do things a bit different than most, it's not always the best but it makes things easy for me..I read Octane's how too and it's excellent, Joe Drums is too, the way I do it nothing moves off your marks, you don't need to remove the radiator at all either...When I do a belt change I always do a valve check while I'm at it, the plugs are already out and the caps are all off so it's a great time to do it..My method is freakin crazy and I'm sure not too many guy's do it this way..I'm way way outside the box..Having control of the pulley is what I like..Having control of the crank too..Ok, remove both valve covers and pulley covers, no need to remove the radiator but if its your first time you may want to, remove your crank cover cap and your timing hole cap and put on t-1 and make sure up is up...I use a 19mm socket and two welders clamps to hold the pulley in place as shown in photo, Paint a mark of reference so you know it's at T-1 with white paint, you can paint it anywhere by the crank you can get too, its all good..12 oclock is the normal spot..I also carefully lock down the crank bolt with the vise grips as shown too[ So clamp all three spots now]..Here's what I do, I lock it at T-1 with the grips to the frame, release the tension on both belts then remove the old belts none of this one at a time stuff, ha ha and then the vise grips so the crank doesn't move, I put on the new belts on loose then clamp the crank bolt back and make sure it's on it's mark so it won't move..Now when you put those clamps on the cams with the socket, place in your new belts into the clamps, it's simple remove old belt place in new..When I did this the first time I was freaking out, because the crank moved on me..If you can keep that sucker from moving it makes everything easier..Here are my photo's, Oh, the tension shouldn't be too tight or too loose either, rotate it twice and make sure your marks are on, they will be.. I release my tensioners just loose enought to remove the belts so then go on not so loose..This works for me and this is how I do mine, then once its all set I check the valves.. It's like I never removed them..Valves should be checked anyway after a belt change in my opinion..
File comment: 19mm socket fits the hole nicely, 80's and 81's have the hole, might need to make a custom cut block of wood for the triangle one's:
File comment: Back side of clamp:
File comment: Crank being held still:
File comment: left side clamp on the center of the socket:
File comment: Vise tools I use to hold the crank bolt..:
It's hard to screw up anything doing it this way, if it's right to start with, it should be right when your done..
Video 1- Overview of the process:
1
Video 2- Lining up the timing marks, belts setup with clamps in place, belts ready to install:
2
Video 3- The rest of the belt change process:
3
Questions?
Post a message in the Tech Talk forums and reference the video or procedure your having trouble with.