


OP
OP
- Joined
- Dec 3, 2009
- Messages
- 22,403
- Reaction score
- 238
- Location
- Van Nuys Ca.
- My Bike Models
- 1983 Interstate
2018 KLR 650
2018 BMW S1000 RR
- My Bike Logs forum link
- https://classicgoldwings.com/forums/dan-filipi.122/
My dark night test results.
Look at the pics and description, you be the judge of the side by side comparison then I'll give you my opinion being there in real life.
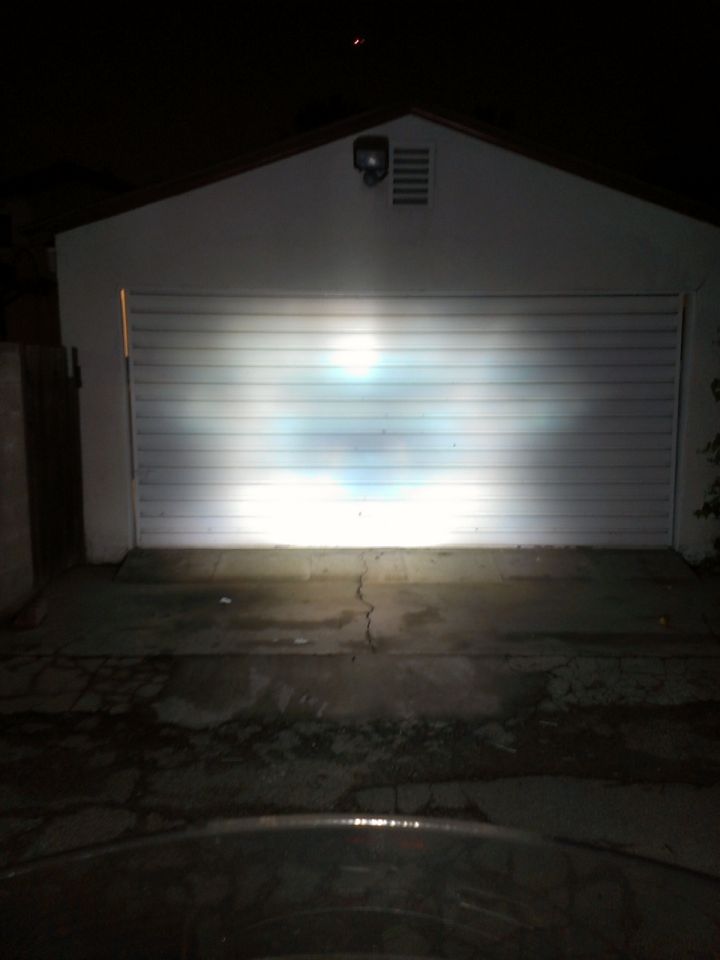
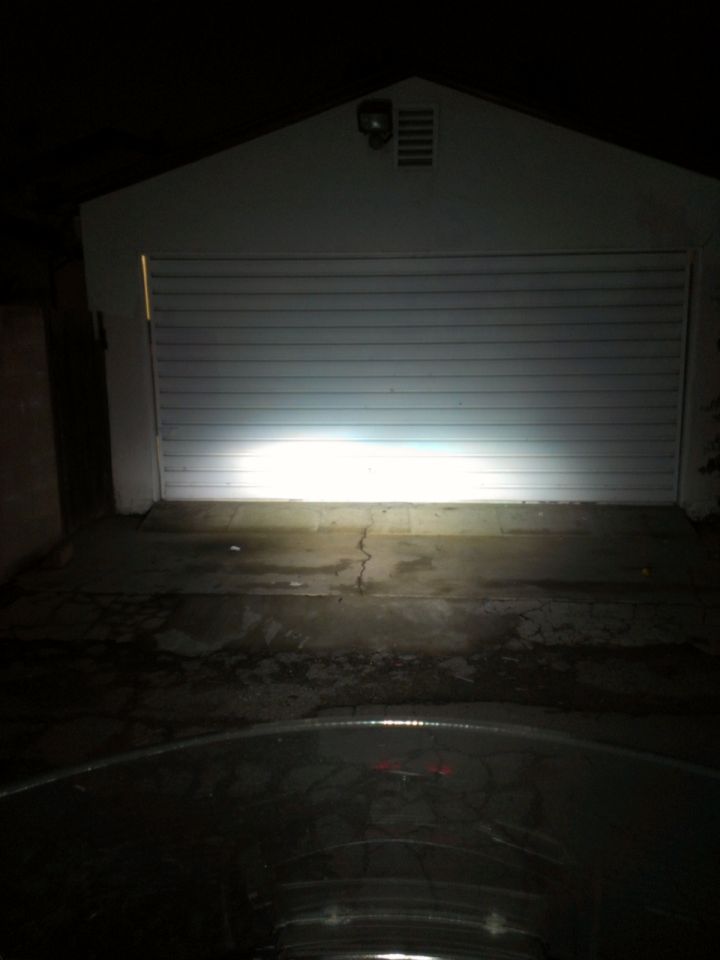
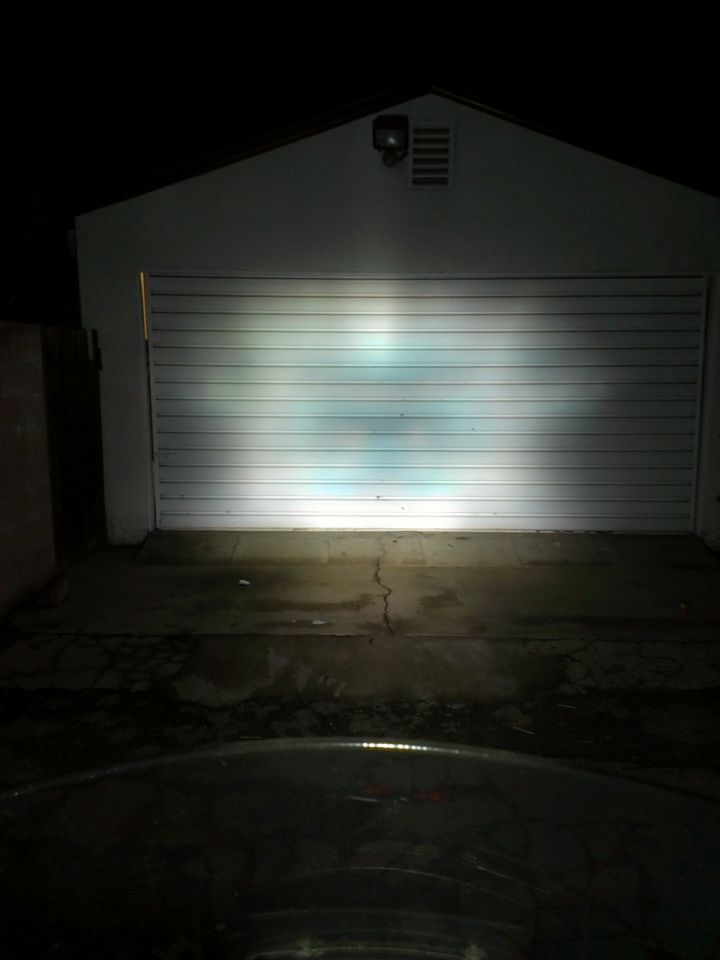
Shining on my white garage door about 20 feet away:
Low beam NO deflector on the bulb
Low beam WITH deflector on the bulb
High beam NO deflector on the bulb
High beam WITH deflector on the bulb

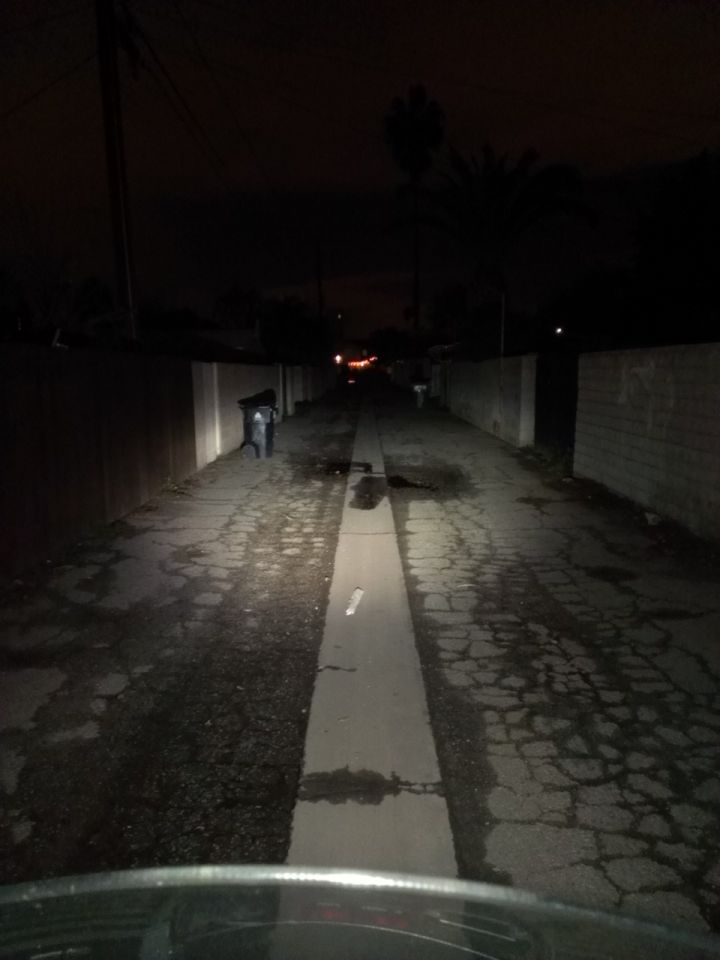
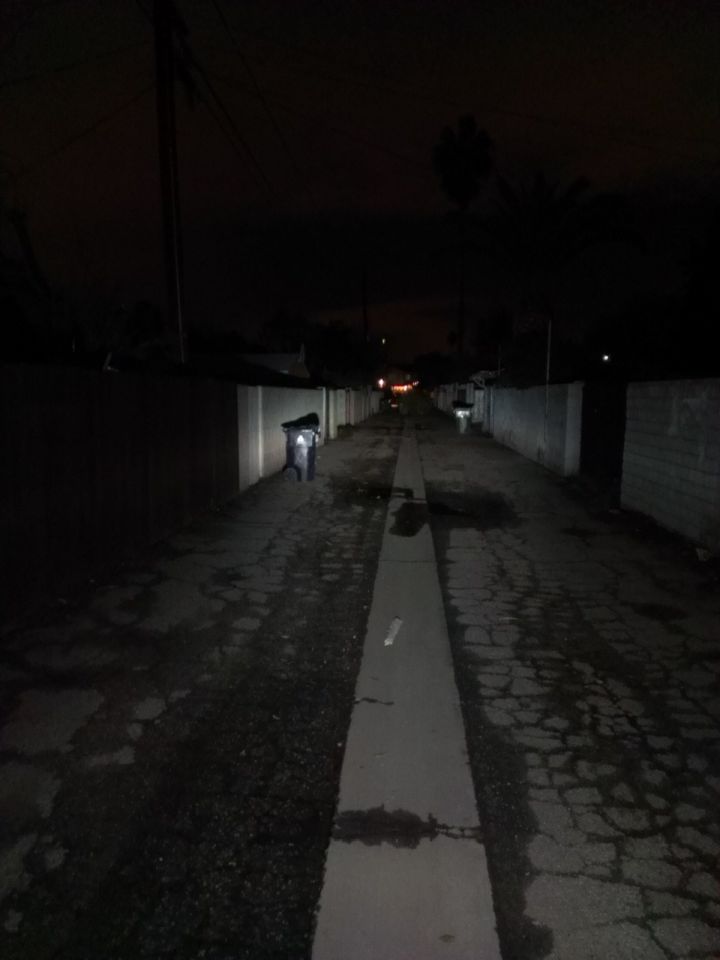
Shining down a dark alley:
Low beam NO deflector on the bulb

Low beam WITH deflector on the bulb
High beam NO deflector on the bulb
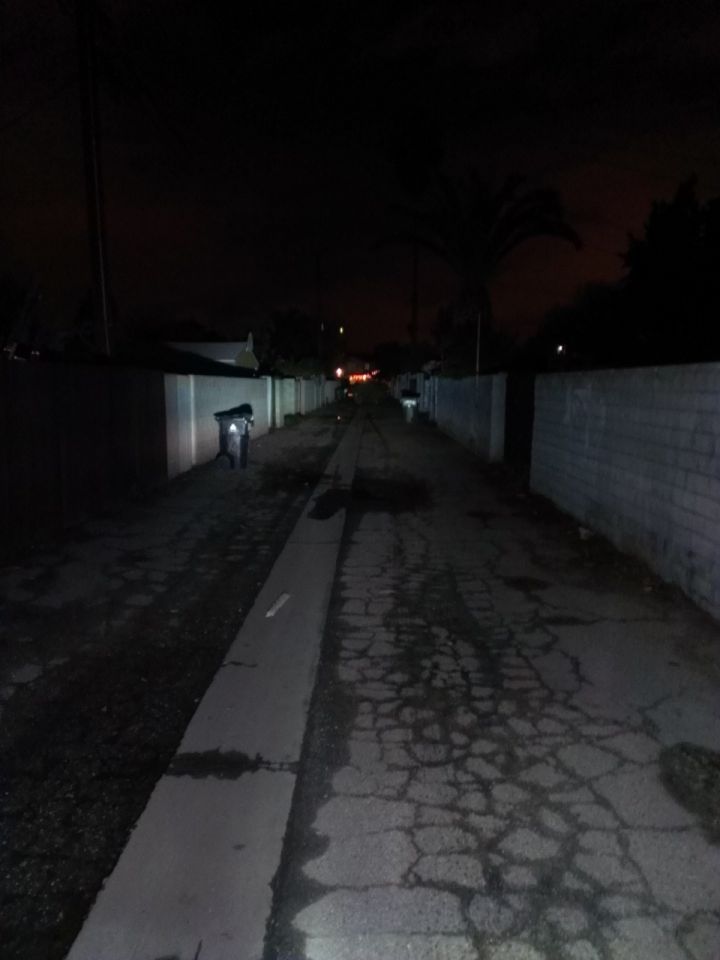
High beam WITH deflector on the bulb
Firstly, without a doubt this bulb puts the stock bulb to shame!!!
Just look how far down the alley it shines on high in the last picture. Incredible.
The light cast forward is much like a car with halogen bulbs, it actually lights the way now!
I should have done this upgrade long ago.
The 6000k color looks amazing.
The light reflection back from street signs makes them much easier to see.
The light projected forward just in front of the bike is a nice 1/2 moon both with and without the deflector.
WITHOUT the deflector a lot of light shines the trees.
It also makes the headlight look much brighter when looking at it while standing 20 or so feet in front of it. Almost too bright.
The beam is more like a flood of light rather than lighting the roadway from left to right.
WITH the deflector the beam is flatter and projects forward evenly from left to right in a fairly wide organized beam both on LOW and on HIGH beam.
I would not hesitate for an instant recommending everyone do this very cool upgrade and definitely buy a bulb WITH the deflector. Much much better.
Look at the pics and description, you be the judge of the side by side comparison then I'll give you my opinion being there in real life.
Shining on my white garage door about 20 feet away:
Low beam NO deflector on the bulb
Low beam WITH deflector on the bulb
High beam NO deflector on the bulb
High beam WITH deflector on the bulb
Shining down a dark alley:
Low beam NO deflector on the bulb
Low beam WITH deflector on the bulb
High beam NO deflector on the bulb
High beam WITH deflector on the bulb
Firstly, without a doubt this bulb puts the stock bulb to shame!!!
Just look how far down the alley it shines on high in the last picture. Incredible.
The light cast forward is much like a car with halogen bulbs, it actually lights the way now!
I should have done this upgrade long ago.
The 6000k color looks amazing.
The light reflection back from street signs makes them much easier to see.
The light projected forward just in front of the bike is a nice 1/2 moon both with and without the deflector.
WITHOUT the deflector a lot of light shines the trees.
It also makes the headlight look much brighter when looking at it while standing 20 or so feet in front of it. Almost too bright.
The beam is more like a flood of light rather than lighting the roadway from left to right.
WITH the deflector the beam is flatter and projects forward evenly from left to right in a fairly wide organized beam both on LOW and on HIGH beam.
I would not hesitate for an instant recommending everyone do this very cool upgrade and definitely buy a bulb WITH the deflector. Much much better.

