How I change my timing belts

Classic Goldwings

Help Support Classic Goldwings:

This site may earn a commission from merchant affiliate links, including eBay, Amazon, and others.

danf

Well-known member
Joined
Nov 17, 2009
Messages
2,210
Reaction score
0
Location
Reseda, Ca.
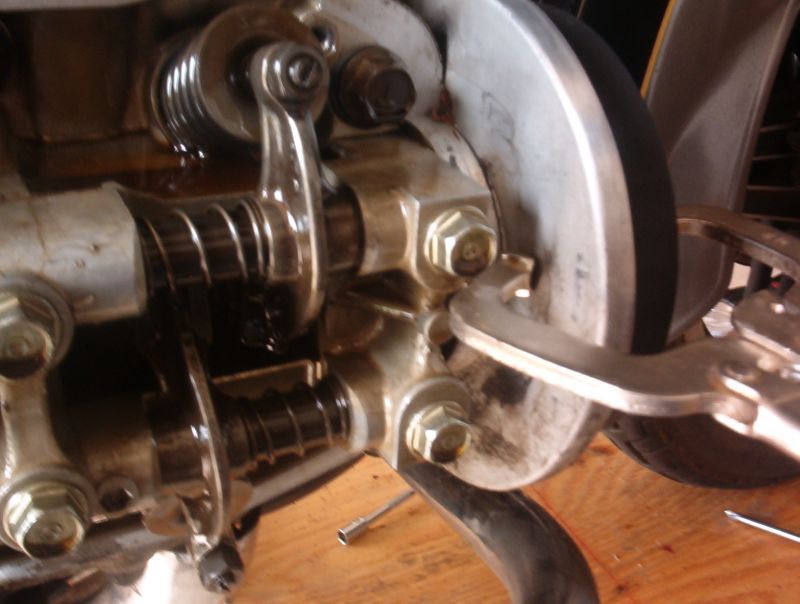
I do things a bit different than most, it's not always the best but it makes things easy for me..I read Octane's how too and it's excellent, Joe Drums is too, the way I do it nothing moves off your marks, you don't need to remove the radiator at all either...When I do a belt change I always do a valve check while I'm at it, the plugs are already out and the caps are all off so it's a great time to do it..My method is freakin crazy and I'm sure not too many guy's do it this way..I'm way way outside the box..Having control of the pulley is what I like..Having control of the crank too..Ok, remove both valve covers and pulley covers, no need to remove the radiator but if its your first time you may want to, remove your crank cover cap and your timing hole cap and put on t-1 and make sure up is up...I use a 19mm socket and two welders clamps to hold the pulley in place as shown in photo, Paint a mark of reference so you know it's at T-1 with white paint, you can paint it anywhere by the crank you can get too, its all good..12 oclock is the normal spot..I also carefully lock down the crank bolt with the vise grips as shown too[ So clamp all three spots now]..Here's what I do, I lock it at T-1 with the grips to the frame, release the tension on both belts then remove the old belts none of this one at a time stuff, ha ha and then the vise grips so the crank doesn't move, I put on the new belts on loose then clamp the crank bolt back and make sure it's on it's mark so it won't move..Now when you put those clamps on the cams with the socket, place in your new belts into the clamps, it's simple remove old belt place in new..When I did this the first time I was freaking out, because the crank moved on me..If you can keep that sucker from moving it makes everything easier..Here are my photo's, Oh, the tension shouldn't be too tight or too loose either, rotate it twice and make sure your marks are on, they will be.. I release my tensioners just loose enought to remove the belts so then go on not so loose..This works for me and this is how I do mine, then once its all set I check the valves.. It's like I never removed them..Valves should be checked anyway after a belt change in my opinion..

File comment: 19mm socket fits the hole nicely, 80's and 81's have the hole, might need to make a custom cut block of wood for the triangle one's:
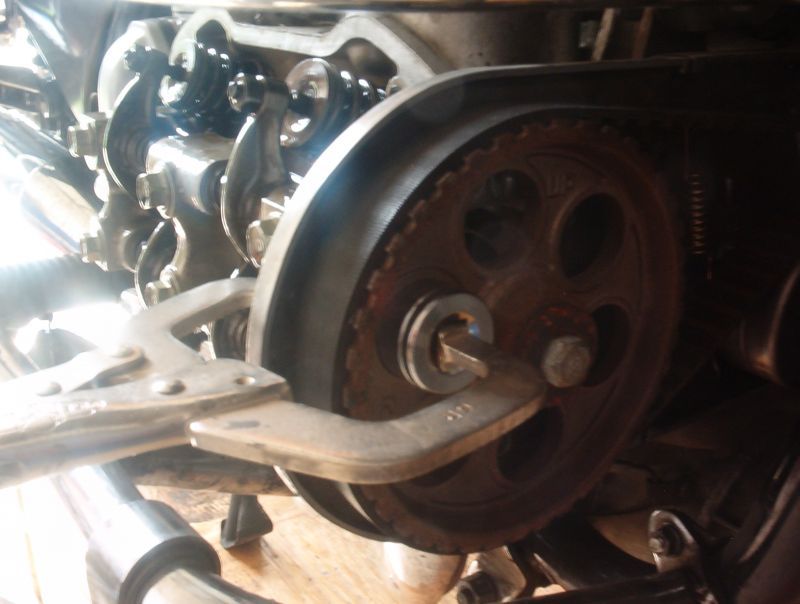
image.php


File comment: Back side of clamp:
image.php


File comment: Crank being held still:
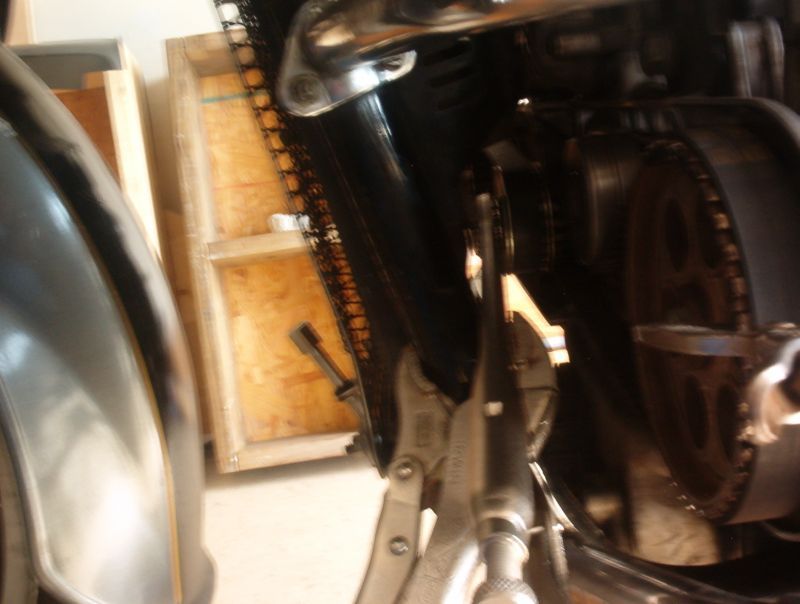
image.php


File comment: left side clamp on the center of the socket:
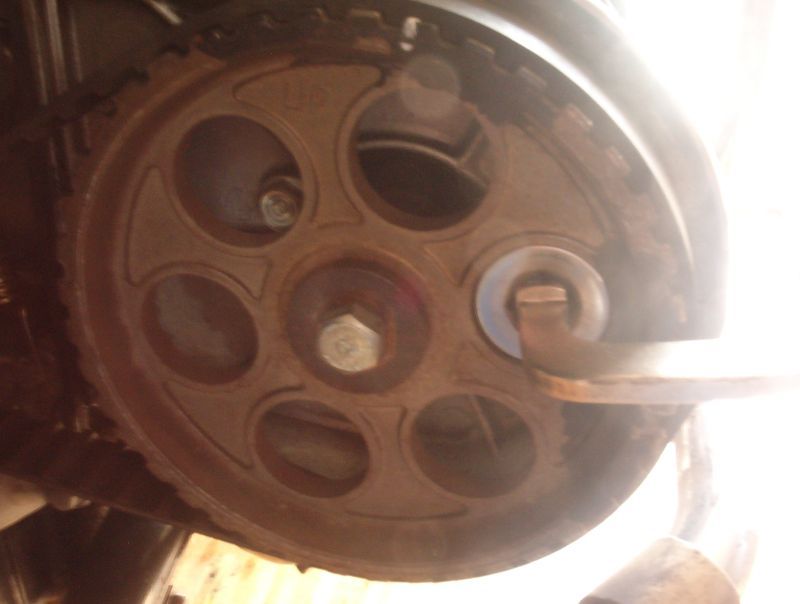
image.php


File comment: Vise tools I use to hold the crank bolt..:
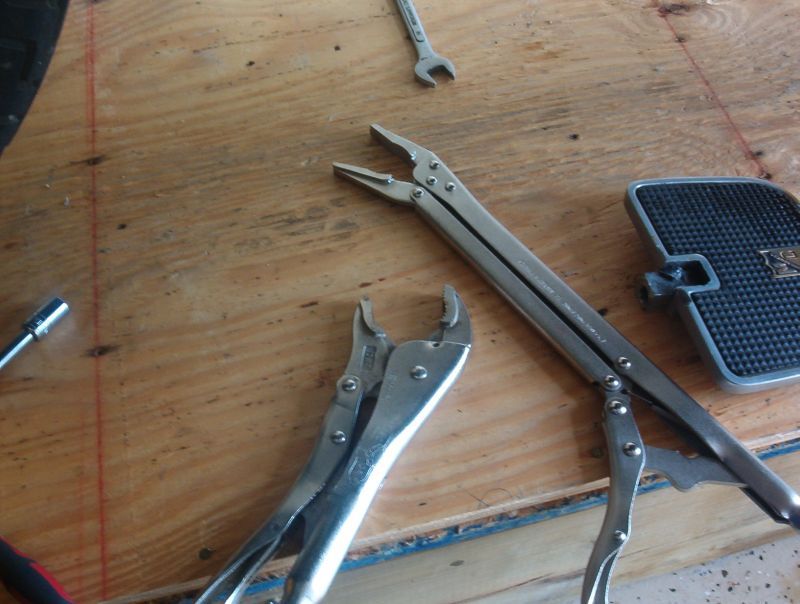
image.php


It's hard to screw up anything doing it this way, if it's right to start with, it should be right when your done..
 
That's great. Just seeing the first picture a light bulb went on in my head. I bet that would work great to help with the springiness of the right side.
 
you could also put the new belts in the jaws of the clamp and never have to remove them to get the new on. excellent job I may have to try this next time.
 
cmonSTART":n2qvr2k1 said:
That's great. Just seeing the first picture a light bulb went on in my head. I bet that would work great to help with the springiness of the right side.
What I like is, you have control of the pulley, I sat there at thought about this idea for 20 minutes, nothing but thinking of how I could do this or a different way of doing it, then it hit me a socket.. If you need to move that pulley down a hair to get the belt on you can..You are in control of the belts and cam pulley..
 
rickyd":2z0ksblo said:
you could also put the new belts in the jaws of the clamp and never have to remove them to get the new on. excellent job I may have to try this next time.
I said that you silly rabbit..put the belts in the clamps... :salute:
 
cmonSTART":2x78jfzg said:
That's great. Just seeing the first picture a light bulb went on in my head. I bet that would work great to help with the springiness of the right side.
that's the idea... :Egyptian:
 
slabghost":zq2rn1tx said:
there are always alternative paths to the goal. Very nice Beav
And you thought I was braindamaged...I am I think so what does that make you guy's... :smilie_happy: especially my friend JoeDrum...ha ha :smilie_happy: I love that guy..
 
correction...I said " Now when you put those clamps on the cam with the socket"...wrong..I meant pulley not cam..Sorry :smilie_happy:
 
beav thats some nice tools you have ....and its pretty good way to do it ....most are not going to have all the tools to do it this way but the concept is good and other tools can be riged this way ......personaly i wouldnt do it this way as i like to check other things .....l like to have the pistons suck in and plugs out to check for any kind valve trouble or stickyness in there operation ...you can find weak spring this way .....by turning the cam buy hand with the valves loose chsck adjusters and such ....but your method is pretty good one and ive done it way before but with different tools to do the same thing ....

i just got finished putting different cams in my 83.....went from 79 1000 cams to 75 early cams ....the one thing i use a lot is a jorgensen wood clamp on the left side or inside belt as to hold it in place after the belt is on to make it easier to put outside belt on to help fight the spring tension on that side even when the valve are all the way loose there still some good pressure there ..........

anyway great write up and good pics as a lot of our members have got some good insight on the proccess of what gose on with your method were getting a great teck build up here on the forum great job beav :popcorn: :laptop: :mrgreen:
 
joedrum":39ji8jub said:
beav thats some nice tools you have ....and its pretty good way to do it ....most are not going to have all the tools to do it this way but the concept is good and other tools can be riged this way ......personaly i wouldnt do it this way as i like to check other things .....l like to have the pistons suck in and plugs out to check for any kind valve trouble or stickyness in there operation ...you can find weak spring this way .....by turning the cam buy hand with the valves loose chsck adjusters and such ....but your method is pretty good one and ive done it way before but with different tools to do the same thing ....

i just got finished putting different cams in my 83.....went from 79 1000 cams to 75 early cams ....the one thing i use a lot is a jorgensen wood clamp on the left side or inside belt as to hold it in place after the belt is on to make it easier to put outside belt on to help fight the spring tension on that side even when the valve are all the way loose there still some good pressure there ..........

anyway great write up and good pics as a lot of our members have got some good insight on the proccess of what gose on with your method were getting a great teck build up here on the forum great job beav :popcorn: :laptop: :mrgreen:
Thank's Joe, everyone has their own way of doing things, I pull the plugs and rotate it by hand too, instead of using a off set wrench, I use a ratchet and socket [12mm] on the rear of the crank [rear of engine] make's it easiers for me..I had thought about locking down the ratchet on the rear[crank], just tie the handle to it still with something so it doesn't move, but I feel there is still too much play in it, using the vise grips [cheap HF] makes certain that crank doesn't move when releasing the tension and there's zero play, that's when it always moves if you don't..I like keeping it still when I release it and having it still when putting on the belts, it's simplifies the whole process..If this method helps out one person, I will be happy...As I know most here have their own methods...I just wanted to share mine with you.. :music: Oh Joe I decided to just remove the center bolt's on the pulley covers and seal them with gasket sealer, the covers come off and on so much faster now, thanks Joe you suggested that and I read it somewhere years ago..
 

Latest posts

Top