Here she is, I named her, "the Wanderer "

Classic Goldwings

Help Support Classic Goldwings:

This site may earn a commission from merchant affiliate links, including eBay, Amazon, and others.
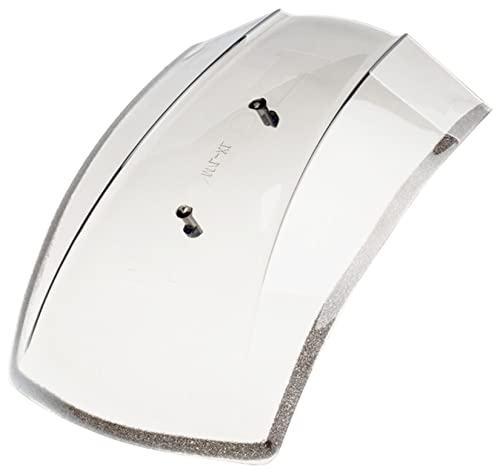
Dowel removed and there was still a gap. I then removed the heat shield and it now sits nice and flush, no gap.

What do I go with now? Appears as though the heat shield could somehow be the problem, but as mentioned earlier, when attached head with new head gasket, I deliberately left off the heat shield and then of course once the head was torqued down, i attached the heat shield according to the manual, using one of the timing cover bolts to line up the heat shield and then bolting. What's interesting is the timing cover bolt on that side, the shorter one is bent. mmmmmmmmmmm........................
 
[url=https://www.classicgoldwings.com/forum/viewtopic.php?p=163624#p163624:kownpv70 said:
dan filipi » 38 minutes ago[/url]":kownpv70]
I recommend ordering 2 new guide pins. They bend easy and we don't want any chance of a chewed up edge preventing a seal.

Best method to install those without damaging?
 
Clean up as best you can it's access hole and the step that stops it, push it in by hand as far as you can, then hit it with a hard rubber mallet. In the block, not the head.

It's the shipping cost that's making those orifice O rings you need look high dollar, adding a couple of dowels might lessen that hurt for you.

but I've got a couple of new ones here if you need them (dowel pins that is).
 
[url=https://www.classicgoldwings.com/forum/viewtopic.php?p=163627#p163627:3s35mhkz said:
chilidawg » Yesterday, 9:03 pm[/url]":3s35mhkz]
Clean up as best you can it's access hole and the step that stops it, push it in by hand as far as you can, then hit it with a hard rubber mallet. In the block, not the head.

It's the shipping cost that's making those orifice O rings you need look high dollar, adding a couple of dowels might lessen that hurt for you.

but I've got a couple of new ones here if you need them (dowel pins that is).

Thanks for the offer, the dowels are pretty cheap though.
 
[url=https://www.classicgoldwings.com/forum/viewtopic.php?p=163598#p163598:1inc50g9 said:
slabghost » November 27th, 2015, 11:24 pm[/url]":1inc50g9]
If it were flooding and not firing the exhaust would have choked you with the smell of raw gasoline.

Then why is that plug fouled with gas smell and that is the area on the head that appears to be blown.
 
well there is no doubt that this cylinder carb has to be screwed up ....if it was good the cylinder would be firing and piston and head and plug would look stream cleaned that aint happening ...so there is a carb problem along with blown head gasket .....both will have to fixed ....stock oldwings are just the pits when it comes to leaking gas in cylinders and hydro lock ...the carbs are the highest thing and can leak in motor times 4 ......so this is a dead cylinder for sure ....it could also be terrible spark from a bad end on wire to bad wire to bad resistor with is also a bad spot on oldwings .....so how this cylinder is...... in my view is multiple problems
 
Waiting on more parts , so decided to overhaul the calipers. Cleaned everything out, replaced seals and a nice fresh coat of High temp paint.
 

Attachments

  • image.jpeg
    image.jpeg
    78 KB
  • image.jpeg
    image.jpeg
    73.4 KB
Interesting read. The caliper looks great too. I hope you're enjoying not having to split your calipers to get your puck out like my GL1000. :head bang: Keep up the good work!
 
[url=https://www.classicgoldwings.com/forum/viewtopic.php?p=163652#p163652:3s41vguj said:
BonS » 9 minutes ago[/url]":3s41vguj]
Interesting read. The caliper looks great too. I hope you're enjoying not having to split your calipers to get your puck out like my GL1000. :head bang: Keep up the good work!


One was a bugga. Had to get out the old grease gun and fitted it into the bleed nipple and out she came.
 
Always read about how well this system worked. :read: Was always lucky, & able to get any pistons to pump out with a good master cylinder. :yes: (after bleeding if needed).Keeping a spacer of some sort, old pads work well, to keep from damaging the piston if it wants to let go all of a sudden. :salute:
 
[url=https://www.classicgoldwings.com/forum/viewtopic.php?p=163606#p163606:3k97grss said:
made2care » Sat Nov 28, 2015 9:53 am[/url]":3k97grss]
Checked engine block and it is right on. No low spots anywhere. Just thinking ahead, I will go with OEM head gasket this time, also , where might i find the little oil orfice o-rings , no need to by an entire kit.

Update, found them on bikebandit, ridiculously priced though.

Personally I would only ever purchase OEM parts so long as they are available. The PO of my bike did all kinds of "fixes" using cheaper after market parts, everyone of them failed. You get exactly what you pay for most times.
 
well there are many who get the cheaper gaskets to work ....ive seen many honda head gaskets blown too...all 90% goo filled gasket are damaged by heat ...they are no where near the best thing to use ...but thats all thats out there unlees you make it yourself ....it why i run my motor as cool as i can get it ...the gaskets are garbage made tech in my opinion from honda to all the others also ...hand fitting the heads is the best way to seal head job ...not honda brand gaskets of goo like all the others .....
 
Did the old permanent marker, sandpaper trick. Had a thick piece of mirrored glass, glued sandpaper to it. Marked head with marker and then swirled on top of sandpaper. You can clearly see the low spot around left cylinder opening, same spot that had orange discoloration , whereby it appears as though the head gasket failed. Went back with feeler gauge and sure enough, low spot. The shop missed that area.
 

Attachments

  • image.jpeg
    image.jpeg
    114 KB
Looking better. Keep going until you get off all the marker. Then remark the surface and do it once more with a fine grit. 600 grit wet/dry paper with a soap solution works well.
 
I'm using 200 to try and get the low spot to left. Went another 20 passes. Still low spot, keep going?
 

Attachments

  • image.jpeg
    image.jpeg
    122.6 KB
I think this could be the issue. Yesterday I thought there might be an obstruction issue with the old dowels/pins but I believe this head is the problem . I don't think I can sand away the low spot and especially since this technique is used just for cleaning and not flattening purposes, but I might be wrong.
 
It takes longer this way than if filing but it will do the job. Just keep going. 200 grit paper will not take off much at a time. Probably only about .005 to go to get all the low spots even. That's still a lot of sanding.
 
Top