


TheRepoGuy
Well-known member
Alright - I’ve had enough with these aftermarket solenoids. Some work for people but the two I’ve bought both from EBay have been junk! SO - after reading a few different posts on different forums, I went ahead and did a bit of experimenting and here’s what I’ve got. She still won’t fire over but I’m better off than I was before because NOW I know she is spinning over the way I want her too! Compression test is next! Here’s the quick how to on the modification.
First off - Go to your local auto parts store and buy a Starter Solenoid for a 1983 Ford F-250 Gasser. Preferably one with the 5.0 motor. The Solenoid looks like this.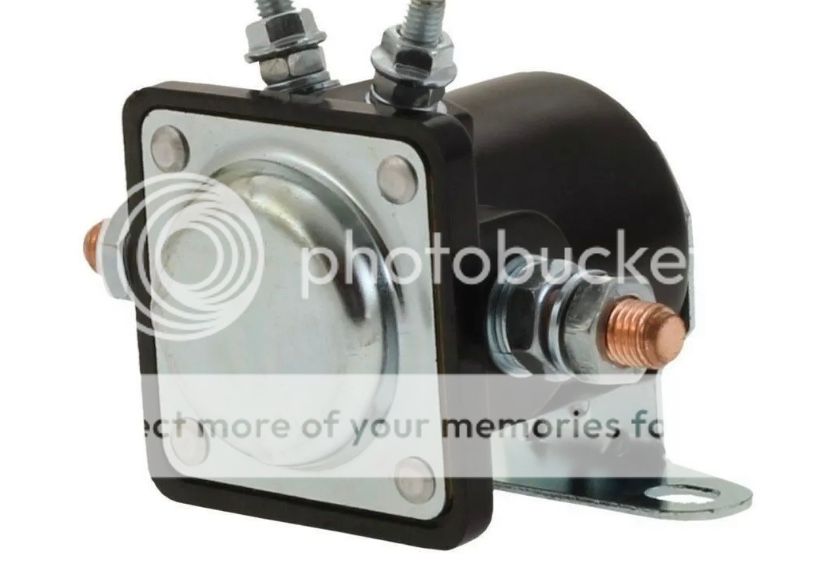
Make sure to grab a 30amp in line ATC fuse too - you’re gonna need it for this install!
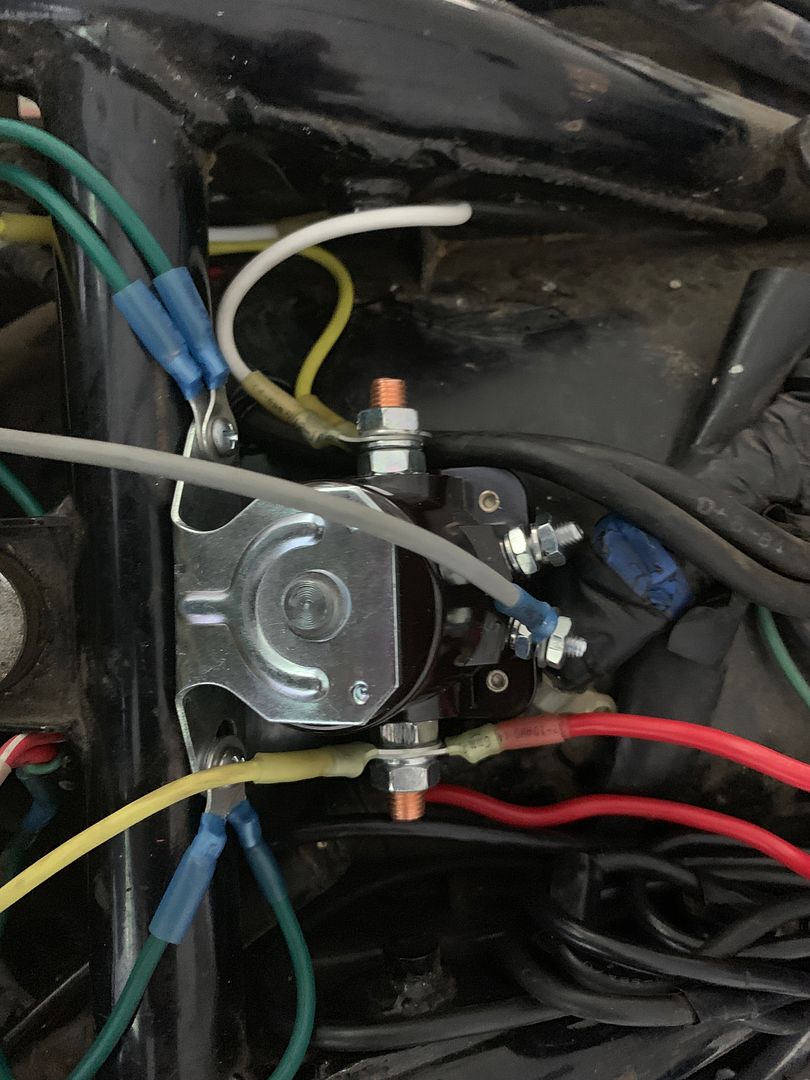
Secondly - you’re gonna have to cut the OE Solenoid plug off your bike. I used 10g AWG copper wire to splice in the connectors in different colors. NOW BEFORE someone goes and gets their panties in a bunch, I left it wired like it is to show what goes where. I have to have a custom length starter cable made to make this a permanent install
Once you have the wires cut unbox your solenoid and it fits REALLY nicely right behind where the bolt hole or whatever it is sits for the main part of the drivers seat. I used a small drill bit and a couple of large self tapping screws and waterproof circular terminal connectors for the wires. Worked perfect to hold the solenoid down to the frame of the bike and works good for the ground as that is through the top of the solenoid.
NOW - These solenoids have 4 terminals on them. Here’s where the wiring comes into play. Your OE plug should have a Solid Red, Red with White Tracer, Yellow with Red Tracer and Green with Red Tracer. You’re not going to use all 4 terminals on the solenoid so don’t over think this! Where it’s mounted on the left side you’ll do the following connections.
Red plus Red/White - Connect them together, use a Yellow 10-12g Weather proof butt connector; crimp that sucker tight with the two aforementioned wires twisted together on one end! Then melt the heat shrink around the two red wires. Next take the inline fuse and crimp one end of it into the end of the connector which has the two red wires and repeat the “melting” process of the butt connector.
That ties up the left larger terminal. THEN - get some 8 or 6 gauge power wire for an aftermarket amp and add two circular connector terminals to it. Make it long enough to reach from that left terminal which has the connection above to the positive post on your battery. DO NOT hook that one up yet but go ahead and use a 13mm wrench to cinch down those two wires on the left side of the solenoid. Leave it free from the battery!!
Next connection is the Yellow/Red Tracer wire. I used the blue circular terminal connector thing (gotta love technological terminology here!!) to a piece of 12g grey wire. This connection goes to the “S” post on the solenoid, simple enough! Hook it up!
Last connection on the solenoid itself is the right side. THIS IS THE SIDE WHICH NEEDS THICKER WIRE than what I have but it’s shown here just to show how to wire it. It will be replaced! You’ll need to use that same 8 or 6g power wire and two circular terminals to it. Connect one side to the right post, 13mm Wrench again and tighten that sucker down! THEN remove your factory starter cable, save it just in case and route the wire from the right terminal on the solenoid through the frame down to the post on your starter. Viola! You’re done with the connections for the most part as far as that goes, now you’ve gotta address the ground!
The Green/Red is your “floating” ground. Take that and before you even crank down the solenoid to the frame and connect it to the mounting portion of the top of the solenoid. Once it is connected then take and run another piece of 10-12g wire again with the circular terminals down to the negative post of your battery. I hit this with a multimeter and I’m not losing any voltage or have a parasitic draw so don’t stress it. Make sure it’s tightened down, use the self tappers and get that solenoid so it won’t move an inch.
That’s it folks - one hell of an explanation for a VERY VERY simple process but hopefully it’ll help someone out! I have an extra ground on the right side just because if I wanted to use it for an accessory I’ve got it.
Here’s the final product
And the video showing the old girl spinning over!
https://youtu.be/IJfZm8EolWQ
This SHOULD last a lot longer than an OE or aftermarket solenoid too.
Enjoy - now to work on some other part and hopefully she will fire!
Nate
Sent from my iPhone using Tapatalk
First off - Go to your local auto parts store and buy a Starter Solenoid for a 1983 Ford F-250 Gasser. Preferably one with the 5.0 motor. The Solenoid looks like this.

Make sure to grab a 30amp in line ATC fuse too - you’re gonna need it for this install!
Secondly - you’re gonna have to cut the OE Solenoid plug off your bike. I used 10g AWG copper wire to splice in the connectors in different colors. NOW BEFORE someone goes and gets their panties in a bunch, I left it wired like it is to show what goes where. I have to have a custom length starter cable made to make this a permanent install
Once you have the wires cut unbox your solenoid and it fits REALLY nicely right behind where the bolt hole or whatever it is sits for the main part of the drivers seat. I used a small drill bit and a couple of large self tapping screws and waterproof circular terminal connectors for the wires. Worked perfect to hold the solenoid down to the frame of the bike and works good for the ground as that is through the top of the solenoid.
NOW - These solenoids have 4 terminals on them. Here’s where the wiring comes into play. Your OE plug should have a Solid Red, Red with White Tracer, Yellow with Red Tracer and Green with Red Tracer. You’re not going to use all 4 terminals on the solenoid so don’t over think this! Where it’s mounted on the left side you’ll do the following connections.
Red plus Red/White - Connect them together, use a Yellow 10-12g Weather proof butt connector; crimp that sucker tight with the two aforementioned wires twisted together on one end! Then melt the heat shrink around the two red wires. Next take the inline fuse and crimp one end of it into the end of the connector which has the two red wires and repeat the “melting” process of the butt connector.
That ties up the left larger terminal. THEN - get some 8 or 6 gauge power wire for an aftermarket amp and add two circular connector terminals to it. Make it long enough to reach from that left terminal which has the connection above to the positive post on your battery. DO NOT hook that one up yet but go ahead and use a 13mm wrench to cinch down those two wires on the left side of the solenoid. Leave it free from the battery!!
Next connection is the Yellow/Red Tracer wire. I used the blue circular terminal connector thing (gotta love technological terminology here!!) to a piece of 12g grey wire. This connection goes to the “S” post on the solenoid, simple enough! Hook it up!
Last connection on the solenoid itself is the right side. THIS IS THE SIDE WHICH NEEDS THICKER WIRE than what I have but it’s shown here just to show how to wire it. It will be replaced! You’ll need to use that same 8 or 6g power wire and two circular terminals to it. Connect one side to the right post, 13mm Wrench again and tighten that sucker down! THEN remove your factory starter cable, save it just in case and route the wire from the right terminal on the solenoid through the frame down to the post on your starter. Viola! You’re done with the connections for the most part as far as that goes, now you’ve gotta address the ground!
The Green/Red is your “floating” ground. Take that and before you even crank down the solenoid to the frame and connect it to the mounting portion of the top of the solenoid. Once it is connected then take and run another piece of 10-12g wire again with the circular terminals down to the negative post of your battery. I hit this with a multimeter and I’m not losing any voltage or have a parasitic draw so don’t stress it. Make sure it’s tightened down, use the self tappers and get that solenoid so it won’t move an inch.
That’s it folks - one hell of an explanation for a VERY VERY simple process but hopefully it’ll help someone out! I have an extra ground on the right side just because if I wanted to use it for an accessory I’ve got it.
Here’s the final product

And the video showing the old girl spinning over!
https://youtu.be/IJfZm8EolWQ
This SHOULD last a lot longer than an OE or aftermarket solenoid too.
Enjoy - now to work on some other part and hopefully she will fire!
Nate
Sent from my iPhone using Tapatalk