Joedrum did you line up your holes by eyeing on the intake or how did you get your holes to the right spots? What I have done so far is taking a stock elbow and turning it upside down over the flange of the grab bar and locking the two together with a socket inside and in my vise between 2 pieces of 2x4's to keep the alignment straight. I saw where someone here had left the flange intact and modified the plug boots instead of cutting the flange down. Was that to keep more strength in the flange as its kinda thin? And hadn't seen if anyone has got the better way to run coolant thru the underside of the plenum. I've seen various ideas on here but not any 1 that seems definitive on keeping the intake charge warm. Air and/or water heat? Which is best?
You are using an out of date browser. It may not display this or other websites correctly.
You should upgrade or use an alternative browser.
You should upgrade or use an alternative browser.
New member and sooooooo much to learn!
- Thread starter weightlifter99
- Start date


Help Support Classic Goldwings:
This site may earn a commission from merchant affiliate
links, including eBay, Amazon, and others.
This is actually my second attempt at a single carb conversion. My previous trial (and error) involved taking the stock air plenum and welding some bent fork tubes fro my sons SV650 ( only the unbent sections! LOL!) onto some flanges I made to fit the plenum side. The fork tubes I cut were the exact length as the stock carb setups and mated into the stock elbows at the head. I fabricated an aluminum plate to cover the top of the plenum and to hold the carb and made some gaskets to fit and hoped they would seal. The carb I used was a Carter yf from a 2.5 4 cyl on a 62 Nova Iron Duke. The way I had to secure the carb to the plate left me with using the stock screens inside the plenum in case of a bolt trying to have some fun with a valve. Not sure if it was air leaks or the carb or if most of the fuel was settling on the bottom of the plenum due to the hiegth difference between the bottom of the plenum and where I had placed the center of the tubes but could only get it to run at 4-5 k rpm's. Would start up and die after a couple sqirts from the carb and wouldn't idle. Thats when I saw what you guys were doing here ans not having that much money tied up in my thing-a-ma-bob I abandoned this design for a more tried and true-er method. I believe it would have helped alot if I had raised the plenum floor up with a teepee design of some sorts inside the pleneum to not only reduce the total size of the plenum as a whole inside but to channel a more direct shot of air/fuel mixture into each of the cylinders. So goes it for trials and errors! From failures new ideas are born!
ok ..it is me that left the flange full ...and there is a 5/8" plywood spacer under the flange ...it is sealed with regular wood glue ...as i found this was gas resistant and really sealed ... the ply wood spacer pick the flange up high enough for me to groove out the the plywood spacer so plugs ends will go on and off ... the grab bars can use the height as they are a bit short of being tall enough ...this dose make the flange very stable ...it also makes lapping coverage over the head surface and really seals down good ... lol right now the gaskets are just cereal box cut outs i did myself ..one on top plywood ans one on bottom ...it has not leaked at all ...and ive had a runners on and off a few times ..cereal box gaskets reused ....better gaskets will be made in the future but in sure ill keep the ply spacers ..the set up seals much better than stock horns ... the raise and seal it gave me were both needed ...
the ply spacers i cut holes in ...i did somewhat like you said on flanges with stock horns ...starting with the center hole first ...a right size drill hole saw be nice did mine with jig saw but i am a master tool user ..then it seemed i had a plumbing pvc piece that i use to line up stock horn with and mark hole with phillips screwdriver an hammer to nark plywood as it fit and center nice in hole
from there the the type4 was place in center of motor and i cut grab bars ... i cut them by hand with hack saw as the runner are thin and it makes the best cut ..again im a master tool user and there is a talent to hand hack saw use that most lack ..runners were always lock in a wood jig when i cut them ...
seems i bolted the ply spacers down with the acorn stock bolts and there was always a partial hole showing ..and with fine round file would get open up to work and the do other side ...as stated i just mark it the best i could and used a sharpen punch to get bubble started filed the high off grinder and punch back the other way on top of log pieces of white oak not yet split ... eventually getting all the runners cut to the type4 ...
the connectors were from a hose i found in a auto parts store they let me go look for one ... i found a 1 1/2" hose with bends that i used ..the bends were nice as they were prebent and came very close to the angles i needed ...got all connectors out of a 20$ hose ..worked great thought hose was overpriced but it was 20 miles to next place....
you have to make sure you do all smart hand stuff here with these grab bars....i missed up the first set of grab bars i bought .... :rant: i am very pleased with the results now
on heat and icing ...icing is a sign of bad fuel mix ...the worst the icing going on the degree of how bad the charge is ...getting the charge right with jetting and carb mods is job one i would not worry about heat now at all ...nice tight non leaking set up is what you want first ....
So you actually have no external heat application going to your plenum and all icing issues you have corrected with simple jetting? SWEET!
yes it seemed when carb was off i could hardly have a day that the icing wouldnt happen ...since i moded the carb for more air at idle and low rpm and also jetted it different i have not had one icing issue at all ... to me it seems the grab bar runners are great .. there thin ... things might be different in the colder weather as its only been a few months maybe less since i got things right ..but there been some cold days here and bike ran well on those days where before no way ...humid days too
some seem to think icing doesn't happen on stock carbs it dose ..the stock racks are very cold natured and run like crap ...guess why ... humid days with temps up do the same ...guess why ...
people just dont connect the two ..cause the effects are somewhat different as is the set up is ... but it is icing that happens to them ... my 79 1000 would ice in fla, on misty humid even rather warm nights and definitely on colder nights on same conditions ... and never ever really come out of it unless you ran the crap out of it ... ignition and other deals involved too for sure
Joe has anyone else found the need to make and install runner risers like you have? Is it because of the 1200's different height? I understand the 1200 is higher on top of the engine right under the intake plenum and I believe you have a 1200 block with 1100 heads and 1000 cams?


$10.19
$11.99
ZALALAS Travel Duffle Bag,96L Extra Large Duffel Bag Lightweight,Waterproof Duffel Bag for Men Women,Black
ZALALAS US

$48.99
$55.00
HONDA GL1000 & GL1100 GOLDWING MOTORCYCLE REPAIR SHOP & SERVICE MANUAL For 1975, 1976, 1977, 1978, 1979, 1980, 1981, 1982, 1983, 1984 & 1985 - NEW, 304 Pages
Classic Automotive Repair Shop & Restoration Manuals


$49.00
WILD HEART Waterproof Motorcycle Duffel Bag PVC500D With Rope Straps and Inner Pocket 40L 66L 100L for Kayaking, Camping, Boating,Motorcycle
ZHONGSHAN WILD FRUIT OUTDOOR


$44.95
Harley-Davidson Bar & Shield Logo Zipper Rugged Graphic Duffel Bag - Black
Wisconsin Harley-Davidson

$39.95
$59.95
Honda GL1800 Gold Wing 1800 (01-10) Haynes Repair Manual (Paperback)
Haynes Repair Manuals


$150.00
1984 Honda Gold Wing GL1200 Factory Service Manual Dealer GoldWing Shop Repair Workshop
GLAVIS ENTERPRISES

$38.79
$45.95
Triumph Bonneville T100, T120, Bobber, Thruxton, Street Twin, Cup & Scrambler (2016 - 2017) Haynes Repair Manual (Haynes Powersport)
GoodwillBooks


$79.95
Harley-Davidson Racing Sport & Travel Duffel Bag w/Detachable Strap- Black/Rust
Wisconsin Harley-Davidson

$48.99
COMPLETE HONDA GL1800 GOLD WING MOTORCYCLE REPAIR SHOP & SERVICE MANUAL For Years 2001, 2002, 2003, 2004, 2005, 2006, 2007, 2008, 2009 & 2010
Classic Automotive Repair Shop & Restoration Manuals


$39.95
$49.95
Honda GL1500 Gold Wing Motorcycle (1993-2000) Service Repair Manual
Haynes Repair Manuals


$73.33
Honda GL 1800 Gold Wing 2001-2010 Repair Manual (Haynes Service & Repair Manual)
Chrome World


$99.00
$129.00
Sena Universal Helmet Clamp Kit for CB/Audio of Honda Goldwing (20S, 20S EVO, 30K)
ProRidersClub


$231.99
$287.99
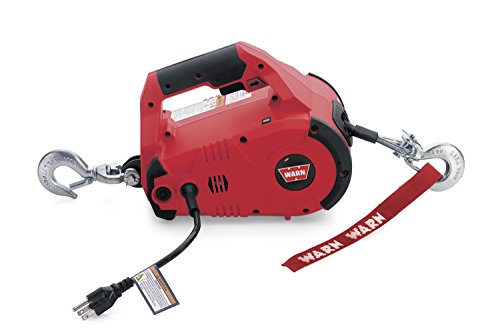
WARN 885000 PullzAll Corded 120V AC Portable Electric Winch with Steel Cable: 1/2 Ton (1,000 Lb) Pulling Capacity , Red
Amazon.com

I messed up on my two to one adaptor to the type 4 plenum and drilled two extra holes which I had to fill in. I was going to braze in plugs but was afraid of the thickness of the plate ( 1/8' I think) it would warp. So I used two rivets and coated them with j b weld top and bottom. Think this may work or maybe I'll have to make another plate?
sould work fine if its not bothering anything else
when I started into mine I was lost lost lost.. These here guys will help you. It's like the dad teacher you never had... Good luck with it . An have a blast..
Thanks Craftman6001 seems you are right from what I've been reading. Great bunch of guys/wingers here! Mucho info and easy to obtain too!
Welcome to CGW
Thanks Backlander much appreciated!
IT LIVES AGAIN!!!! just got off a ride realo close as I' afraid this Wing is going to have earn my respect again. Used the 1 1/2 ss grab rails...langdon carb and adapter...adaptive baseplate for the adapter to the type 4 plenum....1 1/2 fuel filler hose and the small circle adapter langdon supplies with his carb...turned air adj screw 1 1/2 turn then adjusted till idle started faltering and backed off 1/2 turn....used original throttle cable bracket and modified it to fit the baseplate for the adapter I made and have some adjustibilaty. Have useage of the full throttle into the secondaries and WOW! What a blast! Have some minor bugs to work out tho...have a coolant leak issue and may have to jet a bit...but MAN! WOW! This thing moves like never before! Used black rtv on ALL gasket joints and it did a good job it seems to seal the air leaks it seems. The wait has mos def been worth the extra time spent and effort to get this Wing running again. Man the bottom end this thing has now as the way it was before...there is NO comparison! Just give it lite throttle and off she goes without any bog or hesitation or throttling up to 3-4 grand as before. Give it two squirts for cold start and its all is needed. idles around 12 right now may change with jetting. But man I'm happy as a french whore at a chip and dale dance!
Just have to fix a few bugs which were expected and let it earn its keep! What a rush!
I owe most all of it to you guys here for the most invaluable of info and guidance. Without the help I found here I would not so estatic at this point knowing my Wing will be ridden now instead of just sitting there. Its been a long hard road but the lite in the tunnel is getting MUCH brighter now!
All I can say is THANKS SO MUCH GUYS FOR ALL THE HELP YOU HAVE GIVEN!!!!!!!!!
I guess I need to change my profile around now and get rid of the "needing scc" to Have done the scc! LOL!
wow this sounds great ... this is what we try and do here ....and a post like this makes all the members proud .... great going
sure would be neat to see some pics of it
sure would be neat to see some pics of it
Joe I will do my best to put up some pics in the next day or two. I am not the best photographer but I should be able to get the gist of my newfound CGW success documented. I can't get over the power this sucker has over the previous ride from last year! Man what a difference! I happier than a pig rolling in his own chit! WHAT A RUSH!!!!
slabghost
Well-known member
Congratulations!! I love reading reports like this! Make a video of a run with it and post it in the single carb video thread.
- Joined
- Jan 27, 2013
- Messages
- 9,855
- Reaction score
- 34
- Location
- Brisbane Australia
- My Bike Models
- 1981 GL1100 “Rats Nest”
1998 GL1500c Val
1987 CBR1000f “The Pig”
1991 CBR1000f Red
Great stuff, nothing better than a positive outcome! :good:
My humble success story is due to the info and help I have been given here at CGW. Thanks to you all.
Welcome from California.