You are using an out of date browser. It may not display this or other websites correctly.
You should upgrade or use an alternative browser.
You should upgrade or use an alternative browser.
New member and sooooooo much to learn!
- Thread starter weightlifter99
- Start date


Help Support Classic Goldwings:
This site may earn a commission from merchant affiliate
links, including eBay, Amazon, and others.


I have full throttle out of carb setup and have some adjust ability left to compensate for stretch when needed.
Man I can't get over how good this thing runs now!
Man I can't get over how good this thing runs now!
cool that makes three with 1 1/2 runners going ....sheesh that the vacume advance on timing ... it also has machanical advance too ...put a hose on it and suck on it and see if it moves the ignition plate ... you will be able to feel it ...oh not running for this test ...if it works you can hook it up to manifold
- Joined
- Jan 27, 2013
- Messages
- 9,855
- Reaction score
- 34
- Location
- Brisbane Australia
- My Bike Models
- 1981 GL1100 “Rats Nest”
1998 GL1500c Val
1987 CBR1000f “The Pig”
1991 CBR1000f Red
+1 on vacuum advance
- Joined
- Dec 3, 2009
- Messages
- 22,446
- Reaction score
- 265
- Location
- Van Nuys Ca.
- My Bike Models
- 1983 Interstate
2018 KLR 650
2018 BMW S1000 RR
- My Bike Logs forum link
- https://classicgoldwings.com/forums/dan-filipi.122/
Suck on the vacuum advance hose.
If it won't hold a vacuum, your better off plugging the fitting it connects to at the carb otherwise it's acting like a vacuum leak and it's not going to do anything anyhow if the diaphragm is leaking.
If it won't hold a vacuum, your better off plugging the fitting it connects to at the carb otherwise it's acting like a vacuum leak and it's not going to do anything anyhow if the diaphragm is leaking.
If it does work does it need full or ported vacum on the weber?


$39.95
$59.95
Honda GL1800 Gold Wing 1800 (01-10) Haynes Repair Manual (Paperback)
Haynes Repair Manuals
$10.19
$11.99
ZALALAS Travel Duffle Bag,96L Extra Large Duffel Bag Lightweight,Waterproof Duffel Bag for Men Women,Black
ZALALAS US


$99.00
$129.00
Sena Universal Helmet Clamp Kit for CB/Audio of Honda Goldwing (20S, 20S EVO, 30K)
ProRidersClub

$150.00
1984 Honda Gold Wing GL1200 Factory Service Manual Dealer GoldWing Shop Repair Workshop
GLAVIS ENTERPRISES


$39.95
$49.95
Honda GL1500 Gold Wing Motorcycle (1993-2000) Service Repair Manual
Haynes Repair Manuals

$44.95
Harley-Davidson Bar & Shield Logo Zipper Rugged Graphic Duffel Bag - Black
Wisconsin Harley-Davidson


$48.99
$55.00
HONDA GL1000 & GL1100 GOLDWING MOTORCYCLE REPAIR SHOP & SERVICE MANUAL For 1975, 1976, 1977, 1978, 1979, 1980, 1981, 1982, 1983, 1984 & 1985 - NEW, 304 Pages
Classic Automotive Repair Shop & Restoration Manuals


$38.79
$45.95
Triumph Bonneville T100, T120, Bobber, Thruxton, Street Twin, Cup & Scrambler (2016 - 2017) Haynes Repair Manual (Haynes Powersport)
GoodwillBooks


$48.99
COMPLETE HONDA GL1800 GOLD WING MOTORCYCLE REPAIR SHOP & SERVICE MANUAL For Years 2001, 2002, 2003, 2004, 2005, 2006, 2007, 2008, 2009 & 2010
Classic Automotive Repair Shop & Restoration Manuals


$79.95
Harley-Davidson Racing Sport & Travel Duffel Bag w/Detachable Strap- Black/Rust
Wisconsin Harley-Davidson


$73.33
Honda GL 1800 Gold Wing 2001-2010 Repair Manual (Haynes Service & Repair Manual)
Chrome World


$49.00
WILD HEART Waterproof Motorcycle Duffel Bag PVC500D With Rope Straps and Inner Pocket 40L 66L 100L for Kayaking, Camping, Boating,Motorcycle
ZHONGSHAN WILD FRUIT OUTDOOR

$231.99
$287.99
WARN 885000 PullzAll Corded 120V AC Portable Electric Winch with Steel Cable: 1/2 Ton (1,000 Lb) Pulling Capacity , Red
Amazon.com


- Joined
- Dec 3, 2009
- Messages
- 22,446
- Reaction score
- 265
- Location
- Van Nuys Ca.
- My Bike Models
- 1983 Interstate
2018 KLR 650
2018 BMW S1000 RR
- My Bike Logs forum link
- https://classicgoldwings.com/forums/dan-filipi.122/
ported.
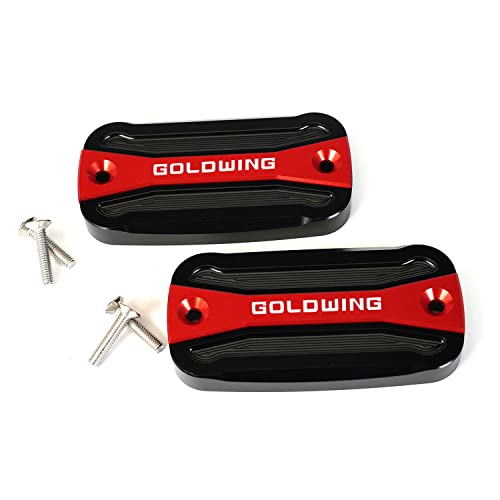
weightlifter99, would you happen to remember (or know) the model number of those grab bars you used? Did you get the 24 inchers or shorter? I love the way you did that, and want to go that route with my setup. Thank you sir!
Honestly I went to my local Lowes...found a house brand...called project source..exposed screw...part # 0116778 18" ( I would have gotten the 12's but they were out) and before I tried them on the bike I took a flap wheel 120 grit on my hand grinder and flattened the weld out some where it meets to the head. IMHO I felt it may give a better/wider seal area for the gasket to seal with the silicone rtv i used. It seemed to have worked for me. Just don't get carried away in the flattening of this weld as you could hurt it more than help it if this happened. Good luck on your project and please keep us informed of your progress! (And be sure to tell Dan and Joe when you become the next member to use these 1 1/2" ss grab bars!) The numbers are rising on this!
- Joined
- Oct 6, 2013
- Messages
- 1,476
- Reaction score
- 80
- Location
- Hopewell,va
- My Bike Models
- 1949 panhead,1972 cb750,1998 cbr600f3 and 2023 can am spyder rt limited sea to sky
Those of you using grab bars,how are you dealing with the angles to the intake plenum
Sent from my iPhone using Tapatalk
Sent from my iPhone using Tapatalk
two 18" grab bars makes 2 runners ...dusterdude i basiclly just set the type4 wher i wanted it or thought it would work and just made a mark on the angle it look like ... but this kind of stuff comes easy for me ... mine are cut close to the outlet not over it or in it ... the 1 1/2 hose connects the two ...to get it right spot at the head i slip in a plumbing piece of some kind that stuck up enough and held elbow end right enough to mark the type4 outlet end
On mine I cut my runners around 4 1/2 length and used a little more fuel hose, about 4 1/4" for each. This hose flexes enough to take up the angle differences to let the flange end bolt solidly to the head and the type 4 plenum actually rests on the top water pipe that connects to the heads. I took the idea from here to bevel the intake edge of the runners where they connect to the fuel hose to help the flow. The heat from the head makes the runners nice and toasty and the transference of heat from the water pipes seem to keep the plenum warm enough to quell any icing conditions.
- Joined
- Oct 6, 2013
- Messages
- 1,476
- Reaction score
- 80
- Location
- Hopewell,va
- My Bike Models
- 1949 panhead,1972 cb750,1998 cbr600f3 and 2023 can am spyder rt limited sea to sky
Cool,thanks guys
Sent from my iPhone using Tapatalk
Sent from my iPhone using Tapatalk
Rear brakes locked up on me the last ride i took. Like to never got the old girl home but luckily was next to the house. Took caliper off and played with pistons and they move back and forth easily against each other...ie...push one in and the other comes outwards so methinks the caliper is okay at this point. Removed the master cylinder and this puppy is locked up tighter than dicks hatband! Noticed the last time I pushed brake pedal down with foot it seemed to have stuck and could not bring it back up. Then thought I must have been dreaming until....the bike would not roll with all the force I had. Has to power it to the house by driving and had to slip the clutch to get it to overcome the brakes. Yep I wasn't dreaming it IS locked up. Put the master in a bucket of brake cleaner and had it soaking overnite and will have to disassemble to find out which piston style is there as I have seen two different piston designs for the 82 I and don't feel they would interchange by the way they appear on the valving. I know Joe said in a previous thread to be sure to clean the bleedback hole which is tiny with a piece of small diameter wire and air blow and then use more pressurized brake cleaner here to be sure all debris is out. And I also read where you have to be VERY careful NOT to scratch th inner bore of the cylinder due to the softness of the aluminum. Any other tips to doing this would be greatly appreciated.
Have found a couple rebuild kits on sleazebay for around 40-45 dollars. Anyone know of a kit any where else cheaper?
Have found a couple rebuild kits on sleazebay for around 40-45 dollars. Anyone know of a kit any where else cheaper?
ok ay on the two piston caliper you bury on out the way back to work the other one back and forth or your just playing eith the pistons and not pushing fluid back through return hole and the switch things and do the other piston ...ive never mess with two piston calipers in a long time ..but im sure this is what i did i think LOL :mrgreen:
Got m/c apart (finally!) and so badly corroded inside don't see how it was operating(wait it wasn't). used chain lube and air pressure to remove the innards and see now what kind of piston it uses. Looks like a screw threaded piston and so much bad gunk came out it. Got it cleaned up and took a well used piece of 320 sandpaper to help clean the inside very carefully as not to scratch or enlarge the bore diameter. Had a bunch of dissimilar metals corrosion inside where the piston was but got it near spotless and no pits so I thinks it'll be okay with a new rebuild kit. Almost gave it up when I first saw how badly the plunger was rusted where the boot had been torn and moisture got inside it. Anyone know of good place other than fleabay to get a good quality kit for this thing?
Kit came in and m/c was rebuilt with these new SHINY parts! Bench bled m/c for several minutes til I felt all the bubbles inside were out. Installed on bike and bled at first banjo fitting at m/c til nuttin but fluid came out. Then proceeded to bleed at banjo fitting at caliper. Nutting but fluid so I said what the heck and opened up the bleeder screw on caliper. After just a few minutes no more bubbles. I said something is fixin to mess up for this is going too smoothly. Went ahead and installed new pads and opened bleeder screw again to gravity bleed. All went well. Okay, time to try my single man bleed proficiency. Pushed down and held brake and with bags off so I could easily get to the bleeder I cracked it open and a little air. Tapped it a little and done it again. Just a bubble er two. Three more times on the bleed and its workin like a chimp! Took for a test ride close by just in case and after they got hot still workin like a chimp. Took it fer a little longer test ride and seated the pads in and man, this oldwing ain't NEVER stopped THIS GOOD!!!!!
Makes ALL the diff in the world in riding confidence knowing you ain't gotta watch so closely every move knowing front brakes is all you got and not getting into trouble too quickly.
Rear brakes stop the bike very well imho and make this oldwing 1 step closer to obtaining the confidence it needs from me to venture out for a trip. Short at first then gradually longer as it proves itself.
And the vacuum advance just got hooked back up and I used the right side port (ported) or the two on the middle of the carb. There are three total and I'm sure the bottom one is straight vacuum and the two tops are ported. Each being a different time of opening.
Does anyone know if its best to use this port or the one on the left?
You don't want straight manifold vacuum going to the advancer, it needs to be ported just inside the throttle plate.
- Joined
- Jan 27, 2013
- Messages
- 9,855
- Reaction score
- 34
- Location
- Brisbane Australia
- My Bike Models
- 1981 GL1100 “Rats Nest”
1998 GL1500c Val
1987 CBR1000f “The Pig”
1991 CBR1000f Red
+1 on vacuum advance port
Well done with your brake bleed and repairs :good: :moped:
Well done with your brake bleed and repairs :good: :moped:
Just finished a 50 mile ride and had nary a problem except at 1 point riding slowly....15 to 20 for several miles oldwing acted as if it were getting hot at idle was stuttering a bit and idle speed dropped off quite a bit. Still had pickup and after a set for about 30 - 45 had no more problems on return trip. May have to make the switch to the no-stat.
But bike is so much more manageable-predictable-controlable and ridable and is a pleasure to be upon now.
I want to say thanks again to all here who helped in ideas and suggestions for without all the help I received here this day would not have gotten here!
But bike is so much more manageable-predictable-controlable and ridable and is a pleasure to be upon now.
I want to say thanks again to all here who helped in ideas and suggestions for without all the help I received here this day would not have gotten here!