canuckxxxx's Single carb manifold build

Classic Goldwings

Help Support Classic Goldwings:

This site may earn a commission from merchant affiliate links, including eBay, Amazon, and others.

canuckxxxx

Well-known member
Supporting Member
Joined
Sep 18, 2012
Messages
1,316
Reaction score
3
Location
Calgary, Canada
Well my single carb journey has taken a detour back to the original concept that West sold us on. That is; flexible hose connecting to the VW plenum and using OEM manifolds. I had put that idea on the shelf because I could not find a fuel rated hose of the right dimensions.

Along came Shovelking's grab bar idea and off I went in that direction.

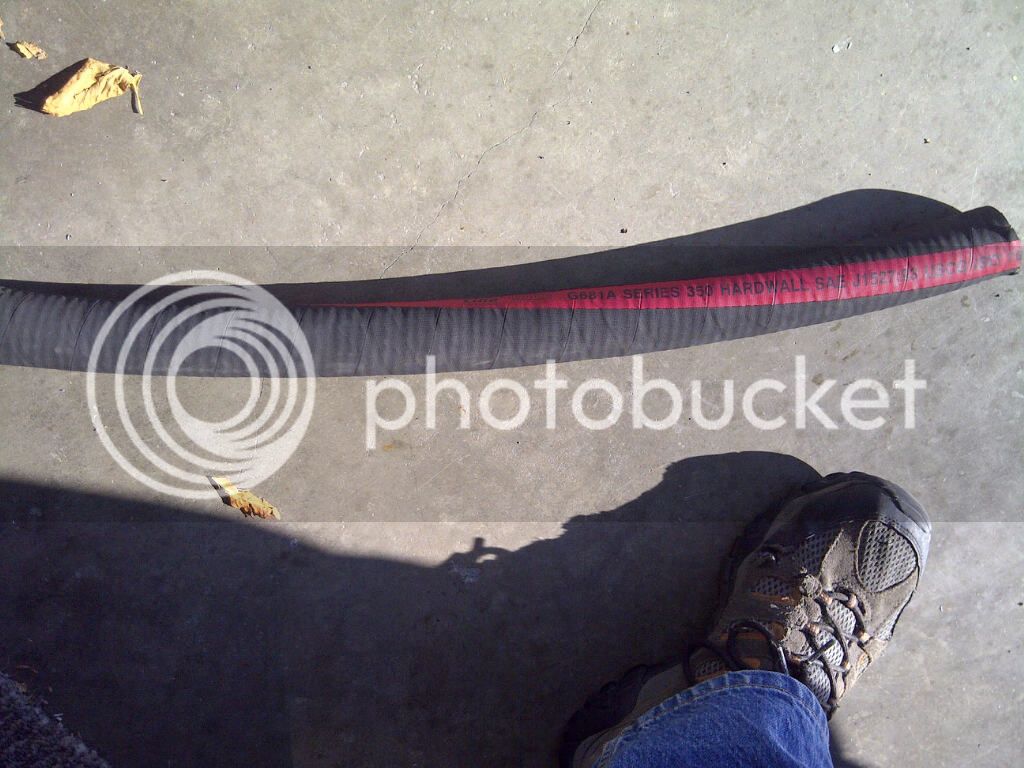
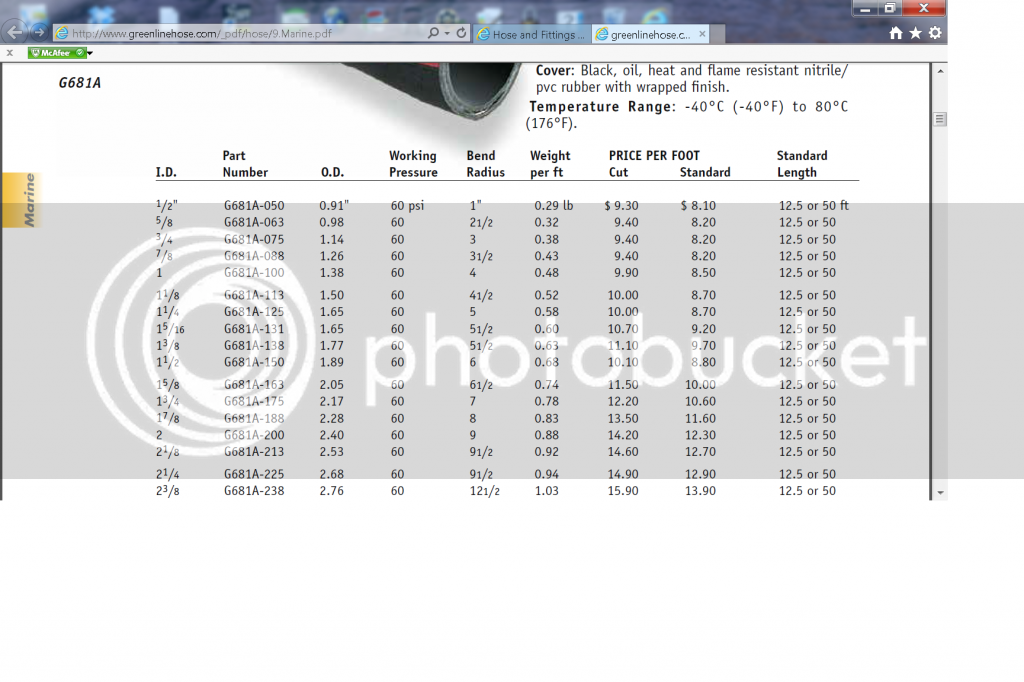
Anyways, today I was at the Greenline Hose store buying a brass fitting to connect the fuel line to the carb. when I asked if they had a fuel rated hose of 1 1/4" ID and 1 5/8" OD with helical coil reinforcement. Turns out they did but they only had 2' left...Perfect. It was only $8/foot so I bought it.

It is the Greenline brand and the number is G681A-125. As you can see from the chart, they have a 1 1/8" hose as well.
Brian
 
that was me that used that type hose ... and still got it ... the hose I use is one step up from that as its working pressure is 200 lbs .....I sure didn't have any problems with it collapsing at all like west did ...it is 1 1/4 ...like you got .... the only problem is getting it to seal ay manifold and horn....if you want more on the way I did it just ask
 
[url=https://www.classicgoldwings.com/forum/viewtopic.php?p=101727#p101727:3jxt9bmp said:
joedrum » Tue Oct 29, 2013 2:57 pm[/url]":3jxt9bmp]
that was me that used that type hose ... and still got it ... the hose I use is one step up from that as its working pressure is 200 lbs .....I sure didn't have any problems with it collapsing at all like west did ...it is 1 1/4 ...like you got .... the only problem is getting it to seal ay manifold and horn....if you want more on the way I did it just ask
Joe, I didn't reolize that you had been down this path. I would be grateful for any advise you can give.

BTW, I stii intend to continue with the grab bar idea too.

Brian
 
[url=https://www.classicgoldwings.com/forum/viewtopic.php?p=101429#p101429:2tkav1az said:
dan filipi » Sun Oct 27, 2013 11:09 am[/url]":2tkav1az]
The reason I put a barbed fitting where the plug is is the hose connection is a nice straight shot in.
A fitting in the side, even a 90 degree fitting was getting in the way with carb going in and coming out.
Just worked out better for me, Jungo too.
I think the thread size where the tape is is the same as the plug.

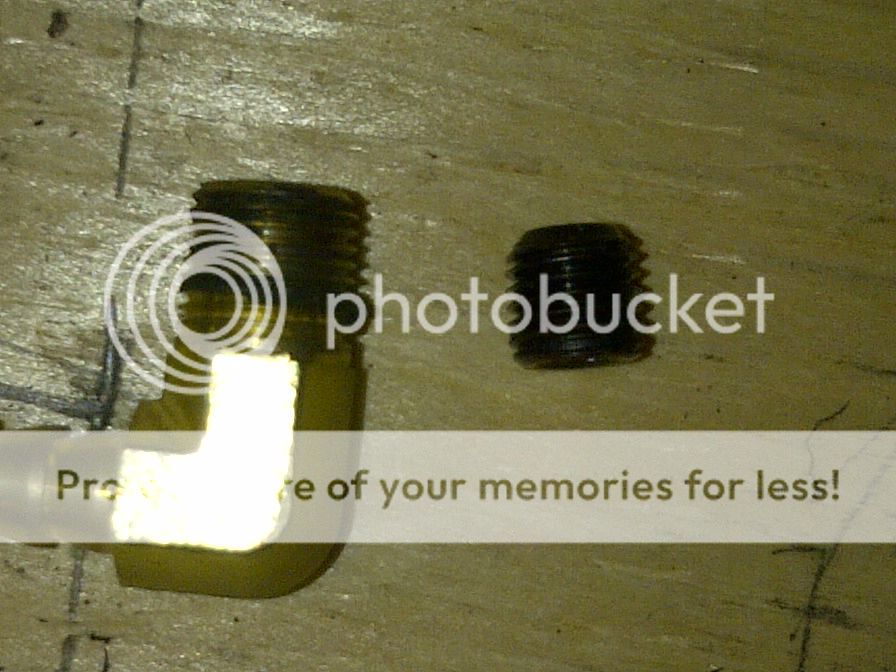
Maybe I have a different carb than Dan, Joe and Jungo but that plug is not 1/8" pipe thread like the connection with the tape on it. It is something smaller.

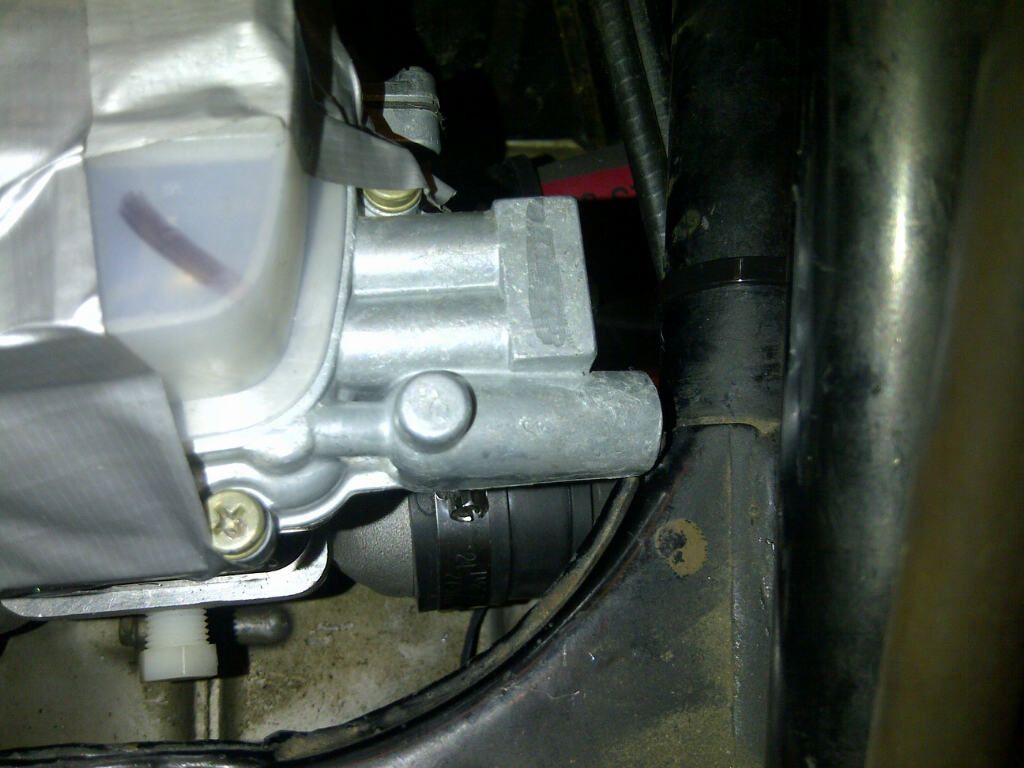
Thing is, I need the fitting where the plug is because, with the carb. in the conventional orientation (with the cables coming in from back) the place where the tape is is right up against the frame. No way to get a 90 degree fitting in there. That is with fuel hose using the OEM manifolds.

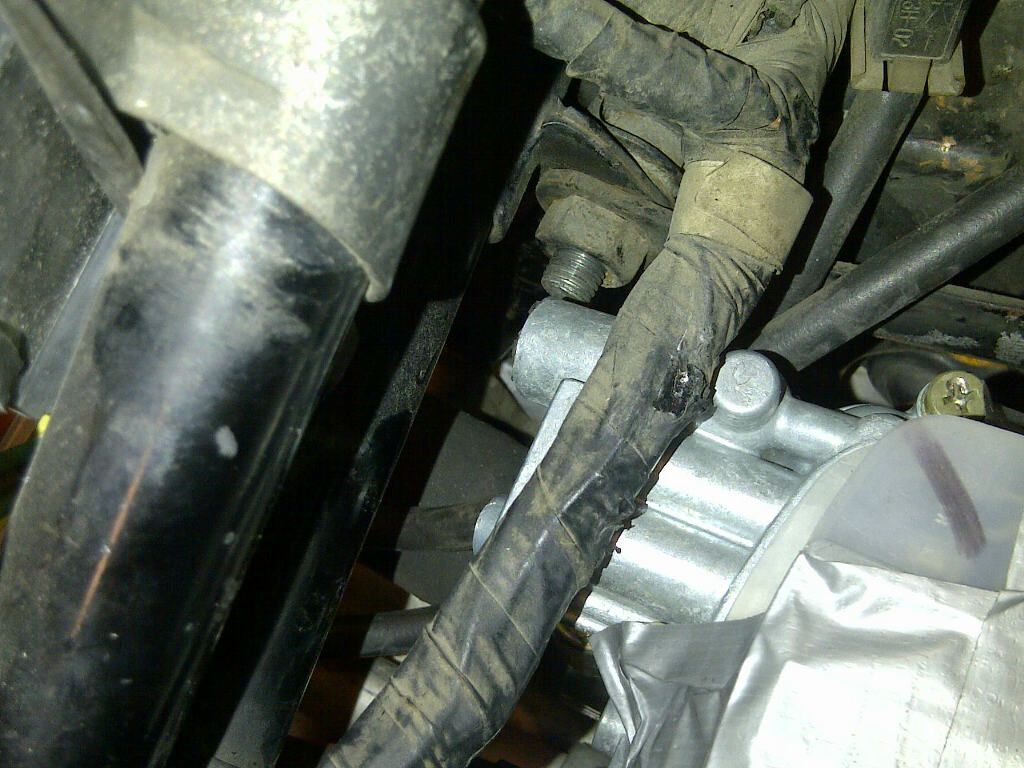
I see that West has his carb mounted with the cables at the front but that will require removing the heat shield, which I really didn't want to get into. He then has the fuel connection at the left front corner which has a bit more room.

Any suggestions will be appreciated.

Brian

fitting vs plug

Fuel inlet at right rear

Fuel inlet at left front
 
Well I decided to mount the carb with the cables at the front and the fuel inlet at the front left side. To do that I completely removed the tin heat shield which really opens up the engine compartment and mades access way better. Honda probably had a good reason for it but I cannot see it.

I had planned on putting short 1 1/4" pieces of grab bar at the plenum end to bridge the gap between fuel hose and inside of the spigot, and to reenforce the fuel hose for the hose clamps, but the grab rail are at a machinist friend so didn't for this first test. So the fuel hose just butts up to the end of the plenum spigot and held in place by the rubber sleeve with hose clamps. No reenforcement at either end of fuel hose for hose clamps.

A few squirts of fuel and the bike started right up. I hadn't heard it run for over a month so it was good to hear it. Had to use the throttle to keep it running until it was warmed up a bit then it would idle pretty good. The next day I took it for a short test ride around the block. It has a big bog at just off idle but when it catches it really takes off. I had an opportunity to open up the secondaries on a straight stretch and it really takes off hard.
I want to add the pieces of grab bar to the ends of the fuel hose and try it again before I take it all apart and do the complete grab install. Will keep you posted.

Brian
 
oh me like ... its hard to get away from how easy this is to do ..with things at hand ...its really hard to make better bends than the stiffer hose can offer ...and still be solid to seal ... most would never think this works but for me it worked really well .....sounds like to much air down low in volune and not enough speed causing bogging maybe ... all motors are different but these weber carbs are full of adjustment to get spot on for sure ....nice work brian
 
Looks great canuck!

#1 is verify there are NO air/vacuum leaks.
I can't stress more how important this is. Very hard to get it running right if there are even the slightest of leaks.

Ether spray is by far my choice for checking. Everything else I've tried missed small leaks.
Just a tiny shot at the fittings will either raise or lower rpm if there's a leak.
Check around the carb base gasket also.
Fix that first.
Your idle needs to be fairly steady when testing.

Yeah, check this carefully first.
No sense going any further to solve the bog until then.
 
cool I like this build ...I bet there not much stuggle to get this done up... he has got a running bike now this is great accomplishment and dialing everything in wont be much ...dans deal on ether is way to start for sure ....
 
My apologies for not posting anything for the last few days but I was at funeral in northern Alberta and we got snowed in so had to stay for an extra day. Speaking of "snowed in" it might be awhile before I can do anymore road tests since it is full blown winter here now. Good news is that I don't have to rush anything since we have another 5 months of winter ahead of us.

Anyways, I got the grab bars back from my friend so I can go ahead and refine the install by putting short pieces of grab bar at the ends of the fuel hose. I am going to buy a can of ether too and check the whole thing for vacuum leaks.

Here are some shots of the crude assembly jig I made using a piece of plywood. I placed the entire OEM carb rack on the plywood and marked the manifold flanges with a sharpie pen. There are pieces of 2x4 under to reinforce the wood screws I used to hold the manifolds down.
 
Nice mockup. You should definitely have it sorted out before the snow melts :good:
 
I think this system, using fuel hose and the OEM manifolds, is the simplest and least expensive conversion. One of the things I don't like about it is that 2 of the hoses have to make an "S" bend in a 4" - 5" length and these heavy fuel hoses are just too stiff to do that. So you end up with the hoses coming into the manifolds at an angle. If I get this build to run well, with no bogging, I will cut the OEM manifolds, rotate and weld them in the direction of the plenum so only a gentle curve is needed. Westgl describes this in another thread. Others have done this build successfully so it should be possible for me too.

I am going to experiment with heating the plenum too. Maybe use my PVC bender heat gun to warm the plenum up and see how the idle and throttle response changes.

Brian
 
OK so I pulled the manifolds/runners/plenum off the bike and put 1 1/4" OD sleeves at each end of the fuel hoses. I cut pieces off my grab rail runners. At the plenum end I made the sleeve long enough to go from internal end of the spigot out to about 1/2" into the end of the fuel hose. At the manifold end I made the sleeves 1/2" long which is just long enough to back up the hose clamps that are squeezing down on the rubber part of the OEM manifold.

Put the whole thing back onto the bike. BTW I took out the cross bar that goes between the top of the top engine supports because it was getting in my way. With it out I can get at the carb bolts way easier.

I started the bike up and let is run for about 10 minutes until the heads were pretty warm. The bike seems to run exactly like it did before I put the sleeves in. Idles nice, once warm, but there's some hesitation when throttle is opened quickly.

The plenum is ice cold even when the engine is warm. I put my heat gun on it for awhile but it doesn't make much difference. What I mean is that as soon as you take the heat gun away it is ice cold right away. I think it will take a lot of heat to keep the plenum warm. But I think getting the plenum warm is necessary and would make a big difference. Until I can reach in there and feel the plenum warm I cannot make a judgment on the manifold.

As per Dan's suggestion, I am still going to get a can of ether and check for vacuum leaks.
 
id be very surprised you have any leaks ...good pics ... the only way mine and your set differs is im jut more choked down at the manifold runner exits ...my sleeves basically choke down to 1" ID and are plastic ....if you an choke the carb and get it rev better then you might want to consider choking down some right there at runner exits to speed the air up some so the carb can atomize better ... :popcorn: starter fluid test cant wait to here :popcorn: :mrgreen:
 
[url=https://www.classicgoldwings.com/forum/viewtopic.php?p=103336#p103336:1ijcktqa said:
dan filipi » Tue Nov 19, 2013 7:12 am[/url]":1ijcktqa]
Yes, good pics and progress!

Will you be able to take it for a run?

In 5 months time as per earlier post :moped: :yes:
 

Latest posts

Top