Yes leave the tack drive and lower part attached and block off where the pump attaches ...my motor with the car carb and everything needed and electric pump and manual switch on it to allow me turn off pump and drain the carb dry while it’s running after a ride ...one thing I found out about weber carbs and DFT clones is they need the electric fuel shut off solenoid or they will leak after running ...till I get another one this is how I keep that from happening ...work great ...and the carb being so tall above motor the electric pump puts gas right there to the carb before I hit the starter and it fires up instantly with the machanical pump I’d have to crank it awhile before it would fire up from gas trying to go back towards the tank while sitting
You are using an out of date browser. It may not display this or other websites correctly.
You should upgrade or use an alternative browser.
You should upgrade or use an alternative browser.
The plan is to turn 140,000 into 50,000
- Thread starter chilidawg
- Start date


Help Support Classic Goldwings:
This site may earn a commission from merchant affiliate
links, including eBay, Amazon, and others.
Pics
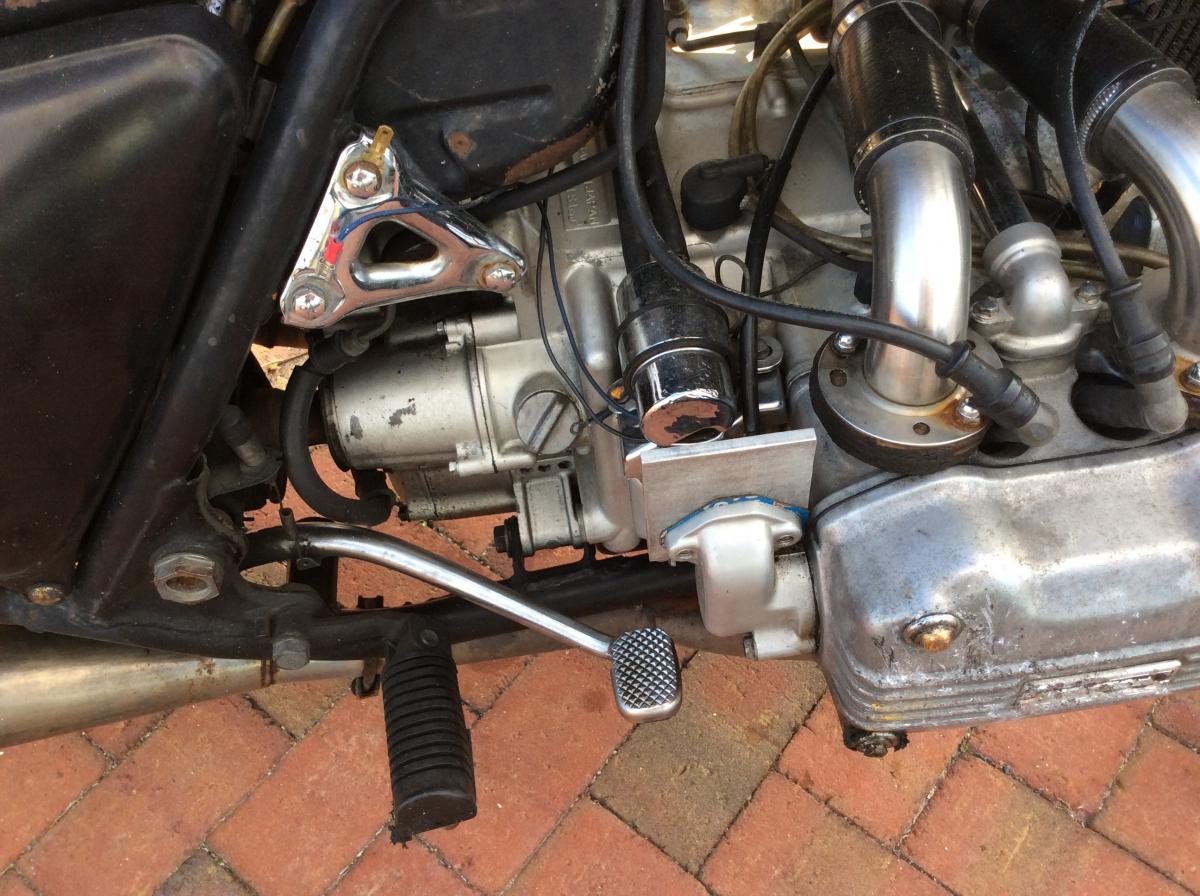
Pic of block off plate 1/2 done ..need to scribe it and cut it ...you can see my cereal box gasket :smilie_happy:
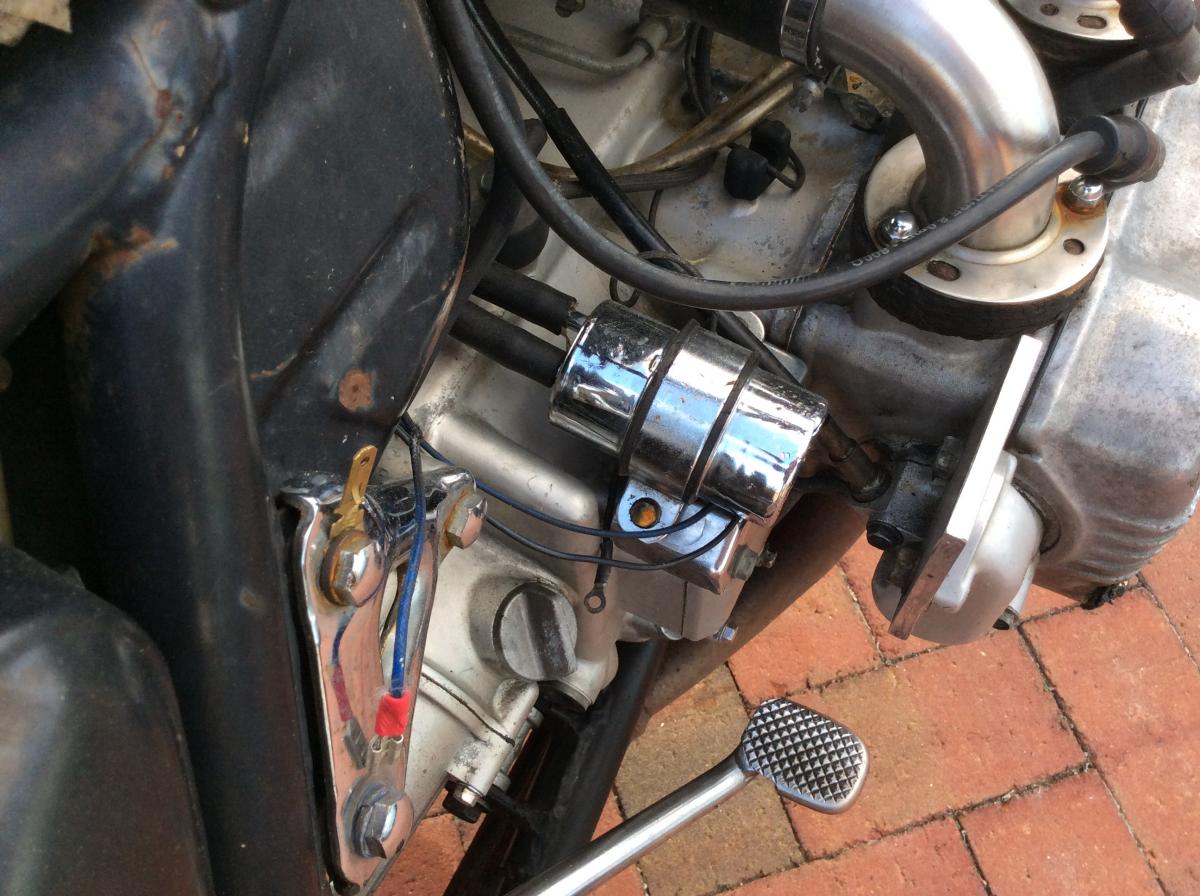
1200 84 fuel pump mounted a bit of finish work there to do also ...out come is fantastic in operation for my bike
Pic of block off plate 1/2 done ..need to scribe it and cut it ...you can see my cereal box gasket :smilie_happy:
1200 84 fuel pump mounted a bit of finish work there to do also ...out come is fantastic in operation for my bike
[url=https://classicgoldwings.com/forum/viewtopic.php?p=208625#p208625:1eoqnqii said:chilidawg » Sat Feb 23, 2019 11:16 am[/url]":1eoqnqii]
From where I sit, it looks like the installation of an electric fuel pump is the easy part.
It's what you do with the old mechanical pump and keeping a well lubed tachometer drive that doesn't leak, that could be problematic!
I mean, the GL1100 fuel pump is a thing of beauty, it gives the whole engine character, it's something that cannot be mistaken for anything else!
Maybe I could just blank off the ports.
CD,
You can "pretty up" the old pump housing. I did this a while back. I kept my original housing and cut up a sacrificial one to add the 1200 pump. It was a fairly interesting tale. If you just want to cut to the install specifics, skip to the 3rd page. But, here's the whole ugly:
https://classicgoldwings.com//forum/viewtopic.php?f=22&t=12155&hilit=fuel+pump
...and if you just want to see the end result:
Attachments

Wow I forgot about that ...that’s about the best I’ve seen done for sure
OP
OP
I think I'm gonna leave the fuel pump mechanical for the time being, thank you all though for your input. Desertrefugee, that thread was a fascinating read, But what with the extra starting capability of the Power Arc and having not had any problems like that yet, as well as it looks like something that can be done later, like, after the bike is built. That for sure looks like the road to go down, when I do.
OP
OP
So here's where I'm at right now.

Cleaned it up the best I could, now I'm waiting on gaskets and seals to install the cams.
HOTT might stop by tomorrow, (he lives locally.) I want to pick his brains on how? If at all, to paint the engine.
This is one of his builds.

Cleaned it up the best I could, now I'm waiting on gaskets and seals to install the cams.
HOTT might stop by tomorrow, (he lives locally.) I want to pick his brains on how? If at all, to paint the engine.
This is one of his builds.


$50.07
M506-2 1993-2000 Honda GL1500 Goldwing Clymer Motorcycle Repair Manual
Classic Automotive Repair Shop & Restoration Manuals


$41.22
$54.95
Clymer Honda GL1200, 1984-1987: Maintenance, Troubleshooting, Repair (Clymer Motorcycle)
Haynes Repair Manuals


$55.09
$58.00
WILD HEART Waterproof Motorcycle Duffel Bag PVC500D Double-bottom With Rope Straps and Inner Pocket 40L 66L 100L for Kayaking, Camping, Boating,Motorcycle
ZHONGSHAN WILD FRUIT OUTDOOR

$48.99
$55.00
HONDA GL1000 & GL1100 GOLDWING MOTORCYCLE REPAIR SHOP & SERVICE MANUAL For 1975, 1976, 1977, 1978, 1979, 1980, 1981, 1982, 1983, 1984 & 1985 - NEW, 304 Pages
Classic Automotive Repair Shop & Restoration Manuals

$33.97
$59.95
Honda GL1800 Gold Wing 1800 (01-10) Haynes Repair Manual (Paperback)
General Books & More

$76.00
Honda GL 1800 Gold Wing 2001-2010 Repair Manual (Haynes Service & Repair Manual)
Clickgoodwill

$15.89
$17.89
ROCKBROS Windproof Thermal Balaclava Ski Mask for Cycling, Running, Skiing - Men's and Women's
ROCKBROS USA


$129.00
Sena 30K / 20S / EVO Helmet Clamp Kit for Honda Goldwing CB Helmet Accessories
ProRidersClub


$33.40
$45.95
Show Chrome Accessories 52-696 Honda Goldwing GL1800 01-10 Radio Panel
Amazon.com


$42.99
$45.25
BELL Star Series 2016 Hinge Plate Kit Street Motorcycle Helmet Accessories - Black/One Size
PERF-MOTO


$100.00
$169.99
1988 Honda Gold Wing GOLDWING GL1500 Service Shop Repair Manual OEM FACTORY 88
GLAVIS ENTERPRISES

$150.00
1984 Honda Gold Wing GL1200 Factory Service Manual Dealer GoldWing Shop Repair Workshop
GLAVIS ENTERPRISES

Yes he’s quite good builder that hott
OP
OP
I had a great visit with HOTT this week and, I wasn't expecting it but he made me an offer that I could not refuse!
He's gonna paint the motor, any color I want, for about the same money that I've spent on gaskets, O rings and oil seals so far!
Sounds easy don't it? Painting a motor, until you figure in what needs to be painted, what doesn't and what does but needs to be removed occasionally. I'm just glad that someone with some experience of doing this, is gonna do it, and not me!
I'm looking at a dark grey color, in line with the "silver/black phantom bike" that the machine has morphed into over the many years of its build.
Lucky you one of the best in my opinion ...sure would like his talent on my bike ....and make it look as good as it runs....it be a Hott bike then
- Joined
- Dec 3, 2009
- Messages
- 11,041
- Reaction score
- 308
- Location
- Kingsport, Tennessee
- My Bike Models
- Former '82 GL1100 "The Slug"
That is a great deal! :good:
OP
OP
So here's where I thought I was on familiar ground! Camshafts, I've done this job at least half a dozen times chasing after more horse power or more recently just getting the C5 to run off of the left head, with as you know varying results. But never without lying on my back, some kind of time constraint or the benefit of both major manuals.
The American Honda manual tells you to use a sealant on the mating surfaces of the cams and the head, (not too much) and then torque the bolts to 15ft/lbs. Making no mention of lubricant!
The Clymer manual tells you to coat the whole cam "and the oil seals" in rebuild lubricant, then tighten the bolts to 18-21ft/lbs. Making no mention of sealant.
Since an early failure I've always used rebuild lube on the main journals and I can see where it would help on the lobes, but never on the oil seals, I always put those in dry, maybe that's where I messed up. As for the sealant, what are you sealing against? Both items are in the same oil void.
But as for that 6ft/lbs difference on the bolt torque? What do y'all think of that?
I'm probably gonna go for 18ft/lbs, from memory, hmm!?! That's what I used before.
OP
OP
Got it covered. Engine rotation is counterclockwise from the rear, clockwise from the front.
Who knew how wrong you could be, after riding one so many years?
Who knew how wrong you could be, after riding one so many years?
OP
OP
Well I guess I knew it had to happen Fella's. But that don't stop it being just a little bit sad!
My beloved OGR1 is an ex-bike, it started yesterday when I pulled the fuel pump but became more obvious today while I was pulling more and more parts to get to the starter motor. Over an 18 year period she has taught me just about everything I know about GL1100's and taken me clear across Texas, New Mexico, Louisiana, Mississippi, Tennessee, Alabama and Arkansas as well as dipping our toe in North Carolina, Georgia, Oklahoma and Kansas and never broke down unless it was, at the house, or somewhere it could be fixed. But I fear, she will never be a complete motorcycle again.
Feeling like this, I'm even more intent on making this project work.
OGR1 is dead. Long live the new OGR1!!
Huh what’s up here !!???
- Joined
- Dec 3, 2009
- Messages
- 22,459
- Reaction score
- 275
- Location
- Van Nuys Ca.
- My Bike Models
- 1983 Interstate
2018 KLR 650
2018 BMW S1000 RR
- My Bike Logs forum link
- https://classicgoldwings.com/forums/dan-filipi.122/
What he ^ said.
OP
OP
I don't know, what's up?
I guess I might have got a little maudlin over ripping into a bike I've spent 18 years building, but apart from that?
I don't know either.
I guess I might have got a little maudlin over ripping into a bike I've spent 18 years building, but apart from that?
I don't know either.
OP
OP
The motor is ready for painting, it's gonna be Black Chrome II. It won't be black when it's done, as the final shade depends upon what it was painted on, it's kinda like a translucent darkener, but it ought to come out the dark grey that I'm after.

OP
OP
There's a change of scenery on the bench.

The motor's gone of to HOTT's place for painting, I finally decided on Acura grey, who would have thought my car would be an inspiration.
I'm gonna clean the frame up the best I can with solvent and FW1, (that stuff is awesome,) and then oil all the captive nut threads.
New head bearings arrive next week, meanwhile I need to find me a good drift to get the old ones out with.
- Joined
- Jan 27, 2013
- Messages
- 9,855
- Reaction score
- 34
- Location
- Brisbane Australia
- My Bike Models
- 1981 GL1100 “Rats Nest”
1998 GL1500c Val
1987 CBR1000f “The Pig”
1991 CBR1000f Red
Nice :good:
This is turning into a complete redo ...something I always wanted to do but havnt been able to do yet ....